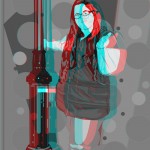
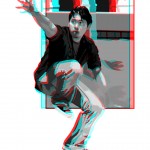
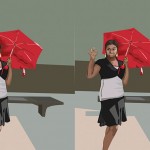
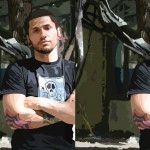
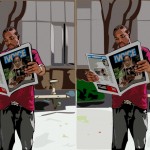
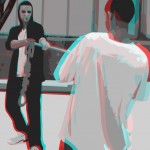
Project Goal: The goal of this project is to explore the history of and techniques for creating three-dimensional images. Students will create a self-portrait based on turn of the century stereoscopic photographic portraits, called stereograms or stereo pairs, and more contemporary anaglyph images and films.
Learning Outcomes: This Midterm Project allows students to skillfully demonstrate an understanding of beginning and intermediate vector skills, professional work practices, creative problem solving techniques, and critical thinking skills through research, documentation and presentation of the project topic. Students will gain experience assessing and discussing their work and the work of their peers in critique format.
Technical Skills: Basic shapes, stroke, fill, gradients, Bezier Pen tool, and use of layers and template file to create a well-organized document. Translation of scanned image into vector-based illustration using minimal points and well-crafted lines and curves. Steoroscopic photographic techniques.
Procedure:
STEP ONE: Research and Documentation
Using the references below begin your research in the history of 3D images and consider the conceptual angle of your portrait. In your sketchbook, document and organize your research.
- Think about the character you will portray in your portrait. It’s up to you.
Here are some ideas:- You in the future
- One of your ancestors
- An historical figure
- Someone you admire
- Example 3D Images:
- Technical Resources
STEP TWO: The Stereo Photograph
(We will do this together in class)
- Take two photographs – one from the position of your ‘left eye’ and the second from the position of your ‘right eye’.
- Follow the Hand Rule:
- For a sharp 3-D composition, the furthest subject within the frame
must be no further than five times (5X) the distance of the nearest
subject .
- For a sharp 3-D composition, the furthest subject within the frame
- Have a foreground and background subject to give the photo depth. Make sure both subjects stays perfectly still for each photo.
- Position the camera about 3 feet from the nearest subject and no more than 15 feet from the furthest subject.
- Take the left shot, move the camera approx. 1.25 inches to the right (or 1/30th of the distance to the nearest object) and take the second shot.
- Do not rotate the camera or move the camera vertically.
- Make sure everything is in focus, both the subject(s) and the background.
PART TWO AND A HALF: Photograph prep
Once the Stereo Photograph has been taken, complete the following to prepare your photograph for import to Illustrator.
Using Photoshop:
- Name the right image rt_photo and the left image lft_photo.
- Open both images and copy the right image into the left.
- Using the Crop tool, set the presets in the Options palette to H 3.25”x W 2.5”. You can keep the resolution at 300 or 150.
- Crop out any part of your portrait, but make sure there is some elements of foreground and background depth.
- Choose Image>Canvas Size, change axis point to the middle left and change the Width to 5″.
- Drag the Right image layer (holding down the shift key) all the way to the right.
- Create a folder called final project and save your this version (name it stereo.psd) to the folder.
- You may also want to adjust the image to make it easier to render the midtones,
highlights and shadows in Illustrator. Save a new version of this file (name it stereo_filter.psd). - Flatten the image and choose Poster Edges or Cut Out. Keep as much detail as possible, while still trying to isolate the shapes that
define the tones. - Save your file.
STEP THREE: Vector Art Illustration (Specifications and Execution)
- Create a new Illustrator file: 3.25” x 5”, RGB
- Save your new file in the final project folder.
- Bring your stereo image into illustrator (File > Place). Double click the layer and choose the template and link check boxes and click ok.
- Recreate the photographs as closely as possible.
- Make sure that each illustration is grouped in it’s own main layer: left and right. Create sublayers in order to keep your illustrations organized.
- Use the Bezier Pen Tool to outline the outer edge of your image. You will toggle between OUTLINE and PREVIEW mode in order to achieve accurate curves.
- In Outline mode begin tracing the mid-tones, shadows and highlights that define the structure of your face. Avoid drawing lots of little shapes at first, instead create broad solid shapes.
- Remember to save and label your color swatches. You can use the Eyedropper + Shift to select colors from your bitmap image or create your own colors in the color palette.
- One good technique is defining all of your midtones and saving those swatches to the swatches palette. Then use HSB and add white or black to develop the highlights and shadows.
- When you have defined the broad areas, go in and start to develop the more detailed areas.
- Create closed paths using the pen tool and basic shapes. Use pathfinder and other commands to transform your objects as needed.
- Toggle between Outline and Preview to see your progress.
- When you are finished, zoom into your illustration and clean up any stray paths, unnecessary or redundant anchor points.
- Save your file.
STEP FOUR: Anaglyph and Stereocard Creation
- Anaglyph
- In Illustrator choose Path > Cleanup.
- Select the right layer of your Vector Art illustration. Zoom out and make sure there no stray points or objects outside the artboard.
Select the right layer from the layers palette and choose Object > Group. Repeat with the left layer. - Use the Align tool to align to each grouped layer to the center of the artboard.
- Delete any unnecessary layers, including your template image.
- If you would like to create a larger Anaglyph image, do so at this time by selecting both right and left layers and resizing the image using the Transform Palette or Menu. Make sure Scale Stroke and Effects is turned on. Keep the original proportions when you resize.
- Create a new layer and name it Intersection.
- Using the line tool create a vertical line across the artboard. Use the Align palette to center it. Repeat with a horizontal line.
- Create another layer and name it box.
- Turn on SmartGuides and draw a rectangle from the center of the intersecting lines. Give this box a 1 point black stroke.
- Turn off the Right Layer and the Intersection layer. Export the Left Layer it as an psd (left.psd). Repeat with the Right Layer (right.psd). Choose RGB, 300 dpi, Flat Image.
- Combine both images in Anabuilder or AnaglyphMaker or use this Photoshop Anaglyph Template.
- Save file as a psd.
- More Tutorials Using Photoshop:
- Stereocard
- Apply crop or trim marks to your document. Using the Artboard or a 3.25” x 5” rectangle as the trim box.
- For a traditional look you can convert your colors to grayscale or sepia using the Filter > Colors.
- Print your stereogram, trim and view in the stereoscope.
STEP FIVE: Presentation Requirements
Save and present your files in the following formats:
- JPG or PSD Anaglyph
- AI (Adobe Illustrator file)
- Color or BW mounted stereocard
- Please burn a CD with all files. Make sure your name is on the CD.
- Please drop all Final Project files into the dropbox. Make sure you folder is labeled with your first initial and last name.
- Example: jsmith_final
Please Note:
- Make multiple copies of your illustration files as you work so that you can go back to earlier versions if need be. This
is also wise because files, Flash drives and ZIP disks can and will become corrupt. - Please stay away from excessive or complicated patterns, gradients, masks and complex paths. You will experience problems.
- The Final project is DUE in class on the last day of class for Critique.
- You will be presenting your work to the class. Any student who does not have a the Final Project IN class for the critique will receive a failing grade. The Final Project is 18% of your grade. Do not miss this class.
