Graphic Design Principles 1 (Fall 2018)

Fall 2018 | COMD1100_D108 | Prof. Spevack

Tag: Critique

Class 30 | Final Critique

December 20, 2018

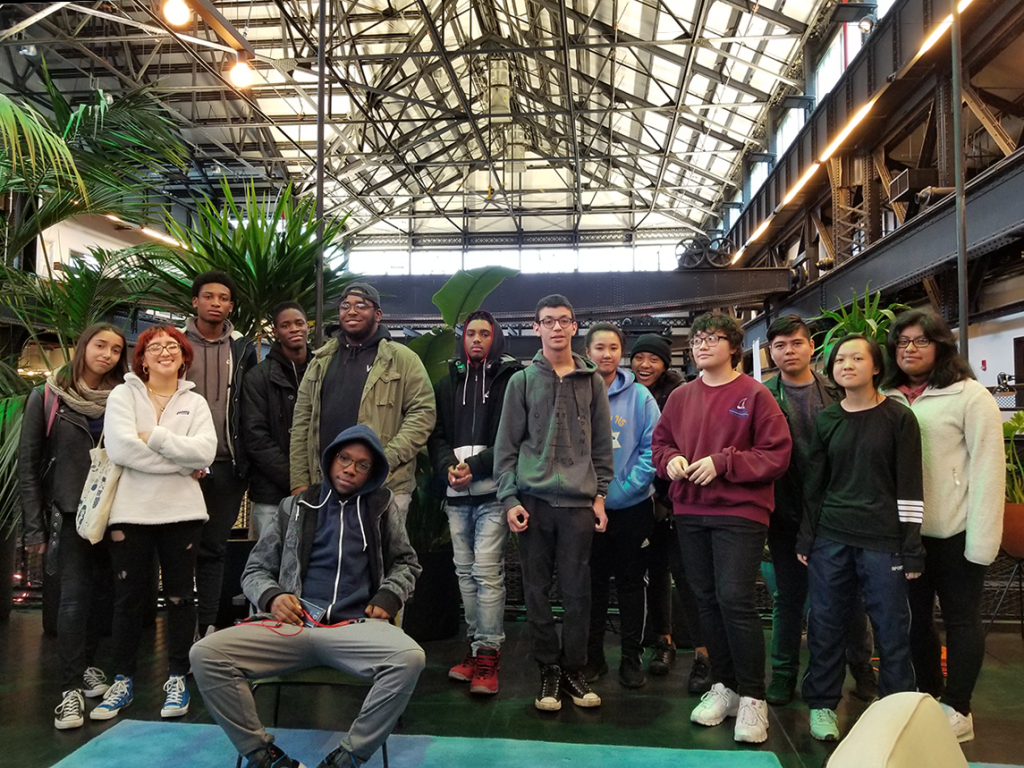
photo of class

Ways of Seeing – FYLC at New Lab

LAST DAY! All work is due.

  • This is a critique class.
  • All students are expected to participate. (Last chance to boost your final grade!)
  • You will not have time during class to complete work. All work is due on arrival.

Discussion / Critique

Grades

  • Turn in your completed Glossument for a grade and possible exhibit.
  • Submit all work, including all parts of Project #6 and any make up/reworked projects.
  • Make sure your blog posts have all required content from Projects 1-6.
  • Grades will be posted by December 28th.

Work Pickup

  • Check this website and your City Tech email to find out when to pickup your physical projects.

Homework

  • Take a field trip once a week and create something (anything) everyday.
  • Please keep in touch!

Class 29 | Glossument Cover

December 17, 2018

What’s DUE?

Materials Needed IN CLASS!

  • Your Glossument.
  • And all materials that you need to work IN CLASS on your Glossument Cover
  • We will work in class to finish the Project #6: Phase 3: Develop

Critique (15 min)

Present Project #6: Phase 1: Discover and Project #6: Phase 2: Define

Lab: Glossument Book Cover

Review PROJECT #6 guidelines very closely and complete Phase 3: Develop.

Phase 3: Develop

Use any medium (digital, painting, collage techniques, etc.) to create a cover for your Glossument that directly references the Proportional Color Inventory you created in Phase 2.

Glossument Cover Guidelines:

  1. Color: Your book cover composition should use the exact proportion of hues from your proportional color inventory. It should clearly demonstrate visual hierarchy through color and should include:
    • Dominant colorSub-Dominant color, and Accent color.
    • A tint, shade or tone.
  2. Medium: Your choice.
  3. Layout: LESS is MORE. Thoughtful, well-considered figure-ground relationship is important. Clearly orientate the viewer. Make sure the viewer understands how to navigate the composition.  Demonstrate visual hierarchy and compositional flow.
  4. Text: The title of your Glossument should be legible.
  5. Important things to focus on: As with previous projects, research, thumbnails, color tests, consideration of overall compositional balance between figure and ground, and unity is important! Because this is your LAST class project, see if you can utilize other aspects of the Basic Principles of DESIGN that we have covered in this class.

Documentation and Feedback

  • Create a new blog post called Color Harmony: Phase 3
  • Add a jpg or png of your Proportional Color Inventory AND a well-light, thoughtfully cropped photo of  your Glossument Cover to show the proportional relationship.
  • Include a paragraph about how the Glossument Cover was influenced by the Proportional Color Inventory. Specifically compare the Dominant colorSub-Dominant colorAccent color and tint, tone, or shade in each. The viewer should be able to see a clear and obvious relationship.
  • Include the hours that you worked on this part of the project.
  • Don’t forget to comment on at least 1 other student’s post.

Homework

Next class is the LAST class! All work is due!

  1. PROJECT #6
    • Phase 1-4 (posted to the Class Blog)
  2. YOUR GLOSSUMENT is due.
    • You will turn in your completed Glossument for a grade and possible exhibit.
  3. Review all the Vocabulary We may have an extra-credit quiz to boost your final grade.
  4. This is your last chance to complete or rework your projects to improve your grade. You will not have time in class.

Class 28 | Color Harmony

December 10, 2018

What’s due?

Materials Needed:

  • Your Glossument

Critique

  • Present your Project #5 Freestudy with your partner for critique.

Discussion (15 min)

Color Harmony:

A palette of hues, shades, tints or tones  is used to produce pleasing color relationships to engage the viewer and it create a sense of order in the visual experience. Successful, harmonious use of color creates dynamic equilibrium and helps to unify a composition.

For our final project (Project #6) we will look at formulas for creating harmonious color palettes and create a proportional color inventory as inspiration for our Glossument book covers.

Color Progressions

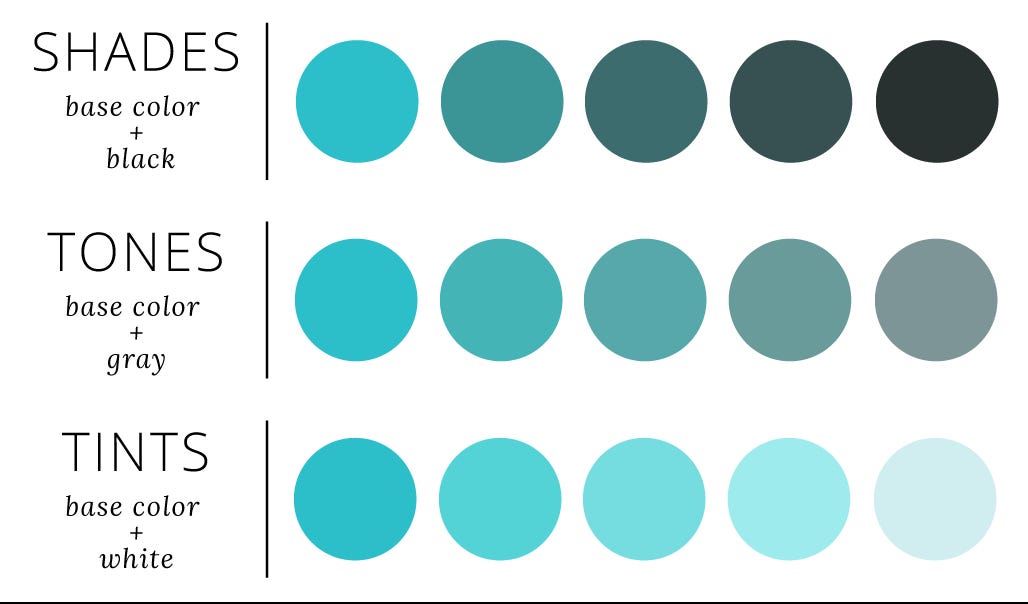
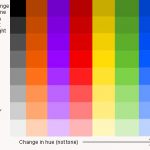
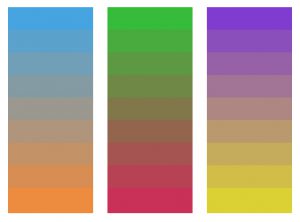
Shades, Tones, Tints scale

Shades, Tones, Tints

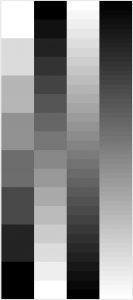
  • Grayscale: progression from black to white in the absence of hue
  • Shade Progression: progression of a hue produced by the addition of black
  • Tint Progression: progression of a hue produced by the addition of white
  • Tone Progression: progression of a hue produced by the addition of gray
  • Complement Progression: progression of a hue produced by the addition of its complement
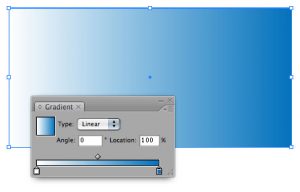
  • Gradient: A gradient or graduated fill used in a digital application is a color fill that gradually blends from one color to another.

Color Relationships

  • Monochromatic: colors that are shade or tint variations of the same hue.
  • Analogous: colors that are adjacent to each other on the color wheel (example: violet, blue-violet, red-violet). They have the shortest interval and the most harmonious relationship because three or four neighboring hues always contain a common color that dominates the group.
  • Complementary: using colors opposite on the color wheel. This relationship often produces visual tension, shock, or electricity (as we observed in our color interaction studies). This is often the least harmonious color relationship. A palette using complements should be “harmonized” with variations in value and saturation. (example: red and green when reduced to chromatic grays soften the effect of simultaneous contrast).
  • Near-Complements: using a color and the color adjacent to its complement. This relationship softens the visual tension produced by using straight complements. (example: red and yellow-green)
  • Split-Complements: based on the triad system, using one color plus two colors on either side of its complement. (example: orange and blue-violet & blue-green). This color scheme adds more variety and an opportunity for a specific accent or focus, if used in unequal proportions.

References:

Color Proportion/Hierarchy/Dominance

In a composition you may wish to have certain colors that are harmonious and share visual qualities (similar value, hue, saturation), and others may need to assert their independence and stand out. These would have less in common with the other colors in the palette (different in hue, saturation and/or value) and would create an accent or focal point. It’s important, when choosing a color scheme to resist the temptation to use all colors in equal volume. Unequal proportions are more interesting and aesthetically pleasing.

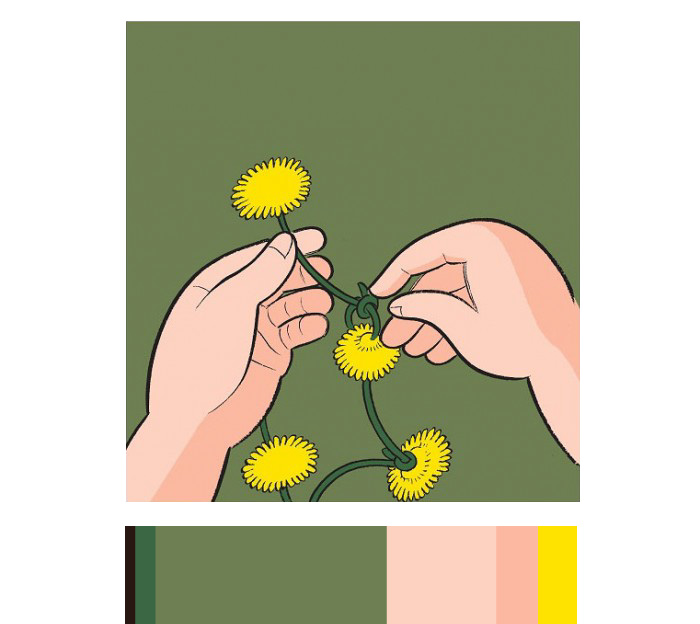
  • Dominant color: color with the largest proportional area – often the ground.
  • Sub-Dominant color(s): colors with less proportional area- they are often analogous colors or variants in tint or shade of the dominant color.
  • Accent color: colors with a small proportional area, but offer contrast due to variation in saturation, value or hue.
chriswarecolorinventory

chris ware color inventory

LAB

Meetings:

  • If you are not up to date with your work, have an INC grade for any project, or are missing any Phase #4: Deliver posts, please meet with the professor to review your grades.
  • It’s up to you to make sure you have completed all the required work for the course.

Homework

Class 25 | Critique & Color Interaction

November 29, 2018

What’s due?

  • All parts of Project #4 should be complete at the start of class.

Critique

  • Present your Swiss Style Poster with your team.

Discussion/Lecture

Visual Perception:

Color Interaction: 

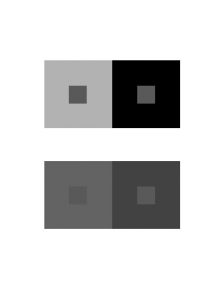
  • Simultaneous Contrast: When two colors come into contact, the contrast intensifies the difference between them.
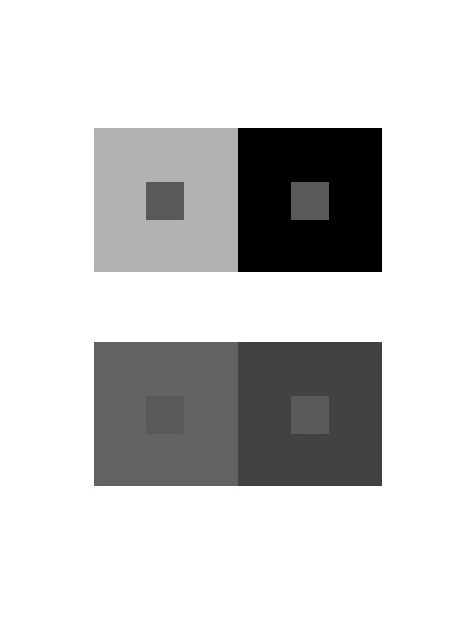
    • Example #1: When a middle gray is surrounded by dark gray it appears lighter than when surrounded by a lighter gray.
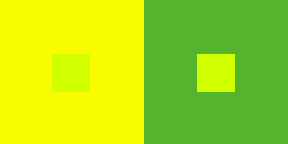
    • Example #2: Yellow-green surrounded by green appears more yellow, but if surrounded by yellow appears more green.
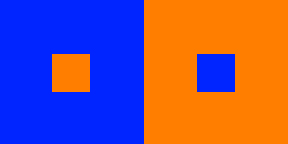
    • Example #3: Complementary hues have the most striking effect– blue is most intense when seen next to orange.
    • Example #4: Gray or white next to a pure hue, like red, will cause the gray to take on its complement, green.
  • Complementary Colors and After Images: After image is an optical effect that is induced from color combinations. If a color and a neutral gray placed side by side the gray will appear tinted with the complement. Due to the influence of afterimage, our brains try to balance the color with its complement.
    • Example: When we see a blue-violet circle on a green square, there is a small ring of red-violet at the intersection of the background and the circle. The reddish afterimage of the green is blended with the blue of the circle to create a red-violet illusion. If the same color is placed on a gray background, the circle appears bluer.
  • Optical Mixing: When a field of color is composed of small, disparate points of color, the mind fuses the colors into a comprehensible whole.
    • Example #1: Four-color printing process uses overlapping dot screens of Cyan, Magenta, Yellow and Black to produce a wide range of hues.
    • Example #2 : Digital imaging on the computer screen uses tiny pixels of color to produce gradations of hue.
    • Example #3: A mosaic or drawing uses tiny pieces of stone or drawn marks to create a field of color.

Josef Albers: The Interaction of Color

  • Josef Albers was a student of the Bauhaus in Germany and color educator at the Black Mountain College and Yale. His experiments in color relationships are used throughout the world in the study of design and color.
  • Classic experiments involved making one color appear as two by placing it within two different background colors.

Simultaneous Contrast References:

Lab 1

Using the iPads distributed in class:

  • Read Section IV & VI and create your own color interaction examples using the Interaction of Color app.
  • Once you have explored the Interaction of Color app, play a few games of Huedoku

Lab 2

Project #5 : Color Interaction Pairings

Goal: Create four groups of paired interaction color studies– making 1 color appear as 2 different colors by changing its surrounding color. Each group consists of 2 pairs. The small square should be the same for each pair.

  • Each PAIR consists of 2 interactions.
    • Group 1-Shifting Value: 2 pairs of achromatic gray studies will explore interactions by shifting value.
    • Group 2-Shifting Value (with color): 2 pairs of color studies will explore interactions by shifting value (with color)
    • Group 3-Shifting Hue, Not Value: 2 pairs of color studies will explore interactions by shifting hue, but not value.
    • Group 4-Shifting Hue and Value: 2 pairs of color studies will explore interactions by shifting hue and value.
    • Extra Credit: 2 pairs of color studies will attempt to make two different colors look as a like as possible.

Limits:

  • Make large squares 2×2″ and small squares 1/2 x 1/2″.
  • The small squares will sit in the middle of the large squares and should be the same for each pair.
  • Two pairing per page, per group.

Process:

Group 1: Shifting Value
2 pairs of studies will explore interactions by shifting value. Using achromatic grays, vary the value of the large square to alter the perceived value of the small square. The small square should be the same value for each pair.

grayscale

Group 2 : Shifting Value in Color
2 pairs of color studies will explore interactions by shifting value (with color).

  • Use this Photoshop file
  • Create (2) color interaction pairs by shifting value in color.
  • Choose one hue as your small, center square color and attempt to make this one color appear as two by varying the surrounding color in the larger square.
    • Make large squares 2×2″ and small squares 1/2 x 1/2″.
    • The small squares will sit in the middle of the large squares and should be the same for each pair.
  • For each pair choose one background hue and adjust the value by adding white or black. Or choose another hue that is of contrasting VALUE (a hue that is lighter or darker).
  • EXAMPLE: The value is altered by adding white to the left square and the complement or black to the right square. The center square appears darker on the left and lighter on the right.

    Blues

    Blues/Violets

  • EXAMPLE:  The slightly muted yellow on the left and the chromatic gray on the right alter the perceived value of the center square.

    Yellows

    Yellows

  • Work with different surrounding hues, altering the perceived value at all levels of saturation (desaturated, muted and fully saturated) until you achieve a perceptual difference between center squares.

Group 3 : Shifting Hue, Not Value
2 pairs of color studies will explore interactions by shifting hue, not value.

  • Use this Photoshop file.
  • Create (2) color interaction pairs by shifting hue, but not value.
  • Choose one hue as your small, center square color and attempt to make this one color appear as two by varying the surrounding color in the larger square.
    • Try to keep the perceived value of both the background square and the center square the same. The shift should only be visible as a shift in color/hue in the center square.
    • For the large background squares choose hues that share similar value, but are a different in hue (ie: complements work well to achieve this type of shift).
    • The background hues will cause the center square to appear as if it’s a different hue. This may be a subtle shift in temperature (warm or cool), but observable.

Example: The center square on the right appears reddish-violet when surrounded by green (complement of red) and the one on the left appears more bluish-violet when surrounded by orange (complement of blue). Notice the value doesn’t change.

hue_interactions

adjustments in hue, not value

hue_interactions_bw

adjustments in hue, not value (seen in grayscale)

Group 4 : Shifting Hue and Value
2 pairs of color studies will explore interactions by shifting hue and value.

  • Use this example photoshop file.
  • Create (2) color interaction pairs by shifting hue and value.
  • Choose one hue as your small, center square color and attempt to make this one color appear as two by varying the surrounding color in the larger square.
    • Make large squares 2×2″ and small squares 1/2 x 1/2″.
    • The small squares will sit in the middle of the large squares and should be the same for each pair.
    • For the large background squares choose hues that are different in value and also quite different in hue. The background hues will cause the center square to appear as if it’s a different hue and also a different value. This may be subtle, but observable.

Example: The center square on the left appears both bluer and darker when surrounded by yellow-orange. The center square on the right appears both lighter and more reddish when surrounded by blue-green.

Hue & Value Interactions

Hue & Value Interactions

Hue & Value Interactions

Hue & Value Interactions (grayscale to show value)

Presentation:

  • Save as PNG.
  • Each group of 2 pairs should be posted to class site in one post (see Project #5 – Phase 2), with captions indicating each Group. Use the Gallery feature to present these 4 images.
    Interaction Pairings

    Group 1 Shifting Value

HOMEWORK
 

Class 19 | Collage Crit & Painting

November 5, 2018

What’s Due?

  1. Phase 2: Define: Completed Collages (Narrow and Broad) using your portrait printouts. Post to the FYLC site, see guidelines.
  2. Come ready to work on your paintings.

Materials Needed:

  • You will need paint materials for this class.
    NOTE: Do not order online. Go to Blick or other art supply store. Do not buy expensive, professional-grade materials.
    • white and black gouache paints
    • student grade, sable-type watercolor brushes (do not buy brushes for acrylic or oil)
      • FLAT:  1/2″ angle, #4
      • ROUND: #1, #5  (or similar)
      • or a pack of brushes like this one
    • two water containers (yogurt cups, soda bottles with tops cut off, soup cans)
    • palette (round 10-well)
    • cotton rags (old white t-shirts or scraps)
    • Sketchbook, pencils, eraser, drafting tape
    • bristol

Critique

Students will present completed (2) 9″x12″ collages to the class.

  • (1) Narrow Value Range: either high-key or low-key
    OR
  • (1) Broad Value Range

Do the compositions presented follow the guidelines?

Copy the following questions into your sketchbook:

  • Is there a clear FOCAL POINT emphasized through the use of CONTRAST and changes in VALUE?
  • Is VISUAL HIERARCHY used to direct the viewer to the FOCAL POINT? How?
  • Is the entire compositional space (9″x12″ bristol) filled with collage pieces?
  • Is there a stable figure-ground relationship?
  • Does the composition follow the rule of thirds?
  • Is the value range, narrow (high or low) or broad?
  • Does it convey a certain mood? What?
  • Is the work clean, neat, and thoughtfully presented?

Demo

Painting Prep:

  • Take a photo of  your finished collages.
  • On a larger piece of paper (taken from the back of the room) outline the size of your collage (9″x12″) and divide the rectangle into nine even rectangles, like the rule of thirds. Extend these marks out from the rectangle about an inch.
  • Temporarily mount your collage on the larger piece of paper. Put some tape on the back of your collage to secure it.
  • Create a viewfinder frame, so that you only see one area at a time while you are working.
  • Keep everything clean and neat.

Broad-Range Painting:

  1. With your collage as a visual reference, you will be using a viewfinder and grid to help paint each area in isolation (independently) from its neighbor.
  2. Use the viewfinder frame and the rule of thirds grid surrounding your collage to isolate each of the nine rectangles.
  3. Recreate (in gouache paint) each gridded area of your composition using a range of black, white, and gray values- achieving continuous tone in areas where highlight and shadow blend together. Use your Value Scale as a guide.
  4. Painting Tips:
    • Do not worry about accurately rendering an eye, nose or ear, see/think only in terms of value and the boundaries of each value relationship.
    • Notice how some values crossover shape boundaries into adjoining areas (open-value), while others are limited by the edges of the shape (closed-value).
    • Remember to work on each rectangle independently and protect your finished painting with tracing paper as you work. Gouache is very delicate and can easily pick up the dirt and oils from your hands.
    • Mix a very small amount of water thoroughly into the paint, for each value you create. The consistency should be like whole milk or cream. Before you apply paint to paper make sure it’s completely mixed in the palette to produce a flat consistent appearance. We want flat, blocks of paint with few streaks or brush marks.
    • Keep two containers of water, use 1 for washing your brushes and 1 for adding water to paint.
    • Wash your brush after each value is mixed and applied.
    • Use a paper towel or rag to get excess paint and water off the brush before mixing a new value.
  5. When you have completed your composition carefully protect all elements with a piece of clean tracing paper and cardboard.

Homework

Due next class:

  • Finished painting

Materials needed:

  • Thumb drive with your original portrait
  • Come prepared to complete a digital collage in photoshop.

Class 16 | Critique & Project 3

October 25, 2018

What’s DUE?

  • Field Trip Reflection:
    • Create a post on the Class Blog about the New Lab field trip
    • Post Title: Field Trip to New Lab
    • Post Content: Choose one new thing that you learned on this field trip. Note the details. Is there anything about this experience that surprised you or made you think or feel differently? Include any images, with caption.
    • Post Category: Field Trip
    • Comment: On at lease 1 other student’s Field Trip post.
  • Project #2 is due!
    • Add your Phase 3 post to the Class Site. We will have critique on Thursday to review your animation work.

Materials needed:

  • Sketchbook, 9×12″ Bristol, pencils, eraser, knife/scissors, ruler/T-square, drafting tape.

Peer Critique

  • Review the guidelines and vocabulary for Project #2.
  • Review all Animated Mashups from the class blog.
  • Choose 2 posts with the least number of comments and provide feedback to each.
  • These should be full, thoughtful critiques of your peer’s good effort. Be thorough and helpful. If you have ideas about how the work can be improved, share them!

Discussion

The Elements: basic components used as part of any composition, independent of the medium.

  • Value: Signifies the relative differences of light and dark
    • Achromatic: Value with the absence of hue (color) and saturation (intensity).
    • Chromatic: Value demonstrated by a given hue.
    • Grayscale: The full range of values simplified into a graduated scale.
    • Low-Key: When the values of an image are predominately dark
    • High-Key: When the values of an image are predominately light
    • Narrow Range: When the values congregate around the dark, middle, or light part of the grayscale.
    • Broad Range: When the values are spread over the dark, middle, or light part of the grayscale.
    • Shadow: Dark area of an object as a result of a disruption of the light source.
    • Highlight: Portion of an object that receives the greatest amount of direct light
    • Chiaroscuro/Tenebrism: Forceful use of contrasting lights and darks, creating a dramatic mood.

The Principles: basic assumptions that guide the design practice.

  • Emphasis: The special attention or importance given to one part of a composition. Emphasis can be achieved through placement, contrast, size, etc.
    • Dominance/Hierarchy: The expression of visual and conceptual order that communicates degrees of importance of the various parts of a composition. This can also be achieved through placement, contrast, size, etc.
    • Focal Point: The elements or objects on which the viewer’s attention is focused.
  • Contrast: Occurs when elements are unrelated or dissimilar in value, size, shape, etc. Increasing contrasts can create dominance.

References:

LAB

Value Range Research: HANDS

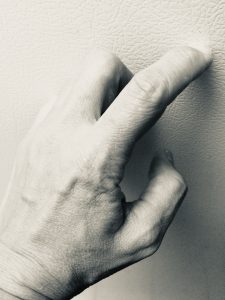
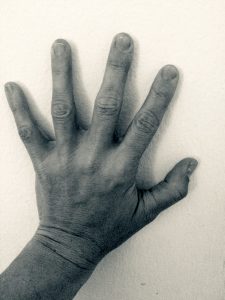
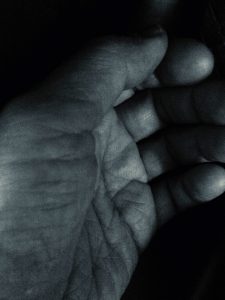
  1. Using your camera or camera phone*, compose 3 photographs of your hands with the following qualities:
    • (1) predominately within the high-key / light value range
    • (1) predominately within the low-key / dark value range
    • (1) broad value range – spread over the dark, middle, or light parts of the grayscale.
  2. If you have the ability to shoot in grayscale or with a silvertone or noir filter, please do.
  3. Designate a new section of your sketchbook and write ‘Value-Added Portraits’.
  4. Compose a minimum 2-paragraph description, with specific references to the images, indicating how the key sets the mood of the composition. Also notice and report how the forms in the composition create highlight and shadow relationships; some may be abrupt, others may have a gradation of value from light to dark. How does this contribute expressive quality (mystery, drama, success, joy, etc) of the compositions?

* If you don’t have a camera, please partner with another student who does.

Value Scale

Complete the Achromatic Value Scale using pencils

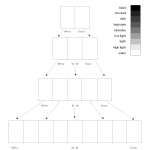
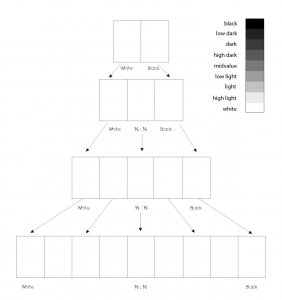
  • On the handout provided, create 4 scales starting with 2 steps and ending with 9 steps ranging from black to white in even, progressive increments.
  • Your 9-step value scale should have black, low dark, dark, high dark, mid-value, low light, high light, and white.
Achromatic Value Scale

Achromatic Value Scale

Homework

Complete the following before next class:

VALUE RANGE RESEARCH:

  • Create a new blog post called Value-Added Portraits: Phase 1.
  • Refine your writing and add it to your post.
  • Add a gallery with your 3 images. Don’t forget to caption them High Key – Narrow Value Range, Low Key- Narrow Value Range, and Broad Value Range
  • Include the hours that you worked on this part of the project.
  • Comment on at least 1 other student’s posts.

PROJECT #2

  • Finish Phase 4: Deliver for Project #2.  If you don’t post Phase 4: Deliver, you will not receive a grade for the project.

Materials needed:

  • Download and PRINTOUT 5 laser prints of your portrait ((DOWNLOAD HERE))
    • IMPORTANT NOTE: If you missed this class and didn’t get your photograph taken, contact the professor BEFORE THE NEXT CLASS.
  • Bring: Sketchbook, 9×12″ Bristol, pencils, eraser, knife/scissors, ruler/T-square, drafting tape.

Class 12 | Crit & Mashup Animation Prep

October 11, 2017

What’s due for this class?

  1. Final inked version of your Pattern Mashup on a piece of 9″x12″ bristol board, based on your finalized preparatory compositions. Come prepared to present your work!
  2. Post to the blog, Sound Visualizations: Phase 2
  3. Your Glossument Book with at least (2) glossary words visualized in the graphic style of your choosing.
  4. Materials needed: Flash/jump drive and/or access to Dropbox/Google Drive

Glossument Check-in (15 minutes)

  • Present your Glossument Book with at least (2) glossary words visualized in the graphic style of your choosing.
  • Next Thursday is our mid-semester milestone!

Peer Critique

In groups of 3, present your finished inked mashups.

  • Present and analyze your finished work in terms of concept, craft, what you learned, and the design process.
  • State your name, your understanding of the project goals (ie: what is the point?), which parts are successful and which parts need more work.
  • When critiquing other student’s work, clearly describe what works and what doesn’t work using the project vocabulary: Line, Rhythm, Repetition, Variety, Pattern, Unity, Grid, Rule of Thirds, Economy
  • Write down your feedback in your notebook and then refine it in a comment.
  • Work together to get your Sound Visualizations: Phase 2 work posted and peer critique comments posted

Lab: Scanning and preparing digital files

SCAN:

  1. Create a folder on your drive called FirstInitalLastNameMashup.
  2. Scan your finished inked Pattern Mashup (300dpi, grayscale, jpg).
  3. Save/rename this hi-res file FirstInitalLastNameMashupHIRES.jpg to the folder you just created.
  4. If  you completed and submitted your completed Inked Mashup in class, find your scan HERE.

DEMO PREP in Photoshop:

Your Mashup Prep in Photoshop:

  • Following the method we walked through in class, complete the following….
  • From the folder you created earlier, FirstInitalLastNameMashup, open your scan in Photoshop.
  • Rename it  FirstInitalLastNameMashupPrep.jpg and save it to the same folder.
  • Make the following adjustments:
    • Image > Image Size: 72 dpi, 1280 wide x “XXXX” high (the height will depend the size of your mashup scan)
    • Image > Mode > RGB Color
    • Image > Image Rotation 90deg (horizontal/landscape), if needed.
  • SAVE AGAIN (Make sure you don’t save over your original hi-res file!!!)
  • Create a new file in Photoshop:
    • File > New
    • Image Preset (HDV/HDTV720) / Image size: 72dpi, 1280 wide x 720 high
    • Color Mode: RGB
  • Save the file FirstInitalLastNameMashup.psd to your project folder.
  • Select All > Copy your FirstInitalLastNameMashupPrep.jpg and Paste into your new file, FirstInitalLastNameMashup.psd
  • With the pasted layer selected, press Command+T (Edit > Free Transform).
    • A bounding box will appear around your image.
    • Grab the lower right square and hold down the Shift key (to restrain proportions) while dragging toward the center of the box.
    • Drag until the bottom of the image lines up with the bottom of the Canvas.
  • Save your file.
  • Next complete the same procedure we practiced in class. Divide up your mashup image into individual square layers.
  • Using the rectangle marquee tool “copy” (Command+C) and “paste in place” (Command+Shift+V) each pattern square on a new layer for use in your animation.

Homework

  1. Complete Animated Mashup Prep
    • Find your scanned hi-res file for animation in this Dropbox folder.
      NOTE:
      If you didn’t turn in your mashup, plan to have it scanned at 300dpi at FedEx/Kinkos, Staples or any copy center with a good scanner. You can also scan at City Tech Computer Labs.
    • Complete PREP in Photoshop following notes from class demo and above.
    • Save to your Dropbox and/or portable drive.
  2. We will animate and add audio to your digital mashup file next class. Come prepared to work!

Class 6 | Project #1 Critique

September 17, 2018

ALL PARTS OF Project #1* are DUE:

  • Bring finished Inked Compositions on 9×12″ Bristol Board (1 stable, 1 ambiguous) to class for critique.
    • Your inked compositions should be labeled in pencil, ON THE BACK with your full name and the project number (ie: Your Name  – Project #1)
      NOTE: Presentation is part of your grade. Points will be deducted if your work is smudged, wrinkled or bent. Protect your work with tracing paper and transport in a portfolio (refer to recent class demo).
  • Design Process – Class Blog posts Phases 1-3 for Project #1 are due.
    • We will use the class blog to present finished work during the critique.
      * You will complete your final post (Phase 4: Deliver) after the critique

Materials Needed for THIS Class:

  • The used book that you are using for your Glossument
  • Materials of your choice: paint, brushes, collage materials, glue stick, X-ACTO knife, scissors, inking pens, etc.
  • We will spend time working on your Glossument in class after the critique.

Discussion (30 minutes)

In the design fields, why is understanding Figure-Ground (positive-negative space) important for communication?

And, lastly, check out these student portfolios!

How to Critique

How to talk about design, using your own words and design vocabulary:

HOW TO GIVE AND RECEIVE A GOOD DESIGN CRITIQUE:

Project #1 Critique (30 minutes)

  • Review Project #1 Guidelines: Project #1
  • Present and analyze your finished work in terms of concept, craft, your learning experience, and the design process.
  • State your name, your understanding of the project goals (ie: what is the point?), which parts are successful and which parts need more work.
  • Your peers and the professor will provide feedback. You will have an opportunity to revise your work based on the feedback and improve your grade.
  • When critiquing other student’s work, clearly describe what works and what doesn’t work using the project vocabulary:
    • Shape (Organic, Geometric)
    • Figure-Ground (Obvious, Ambiguous, positive space, negative space)
    • Framing
    • Economy
    • Unity

Glossument Work (90 minutes)

  • Cut out windows
  • Glazes, paint and gesso
  • Work in class to visualize 1 glossary word in your book by the end of class.

Homework

  1. Complete the final phase (Phase 4: Deliver) for this project
    • Create a new blog post called Urban Artifacts: Phase 4.
    • In the post, document your thoughts about this project. Think about what you learned, what you could have done better (planning, material use, craft), and how you will apply what you learned to your next project. Consider and respond to the comments made in class during the critique.
    • Include links to your three other Design Process posts for this project. (ie: Phase 1: Discover, Phase 2: Define, Phase 3: Develop). Here’s an EXAMPLE!
    • Don’t forget to comment on at least 1 other student’s Phase 4 post. Review commenting guidelines first.
    • NOTE: You will receive a grade and comments from the Professor on this post. If you do not create this post, you will not receive a grade for the project.
  2. Materials needed for next class:
    • your favorite piece of music
    • headphones
    • sketchbook (always)
    • Pencils (wide range from 4H to 4B)
Scroll Up