COURSE CALENDAR | WEEK 15 CLASS OUTLINE | EXAM
Final Projects are DUE!
- FINAL EXAM (20 points)
- SURVEY: Please take this anonymous course survey-- it's different from the one given by the college (your opinion matters to me).
- Cool! 3D is the old, new future. (NYT article)
- Finishing the Anaglyph and Stereocard
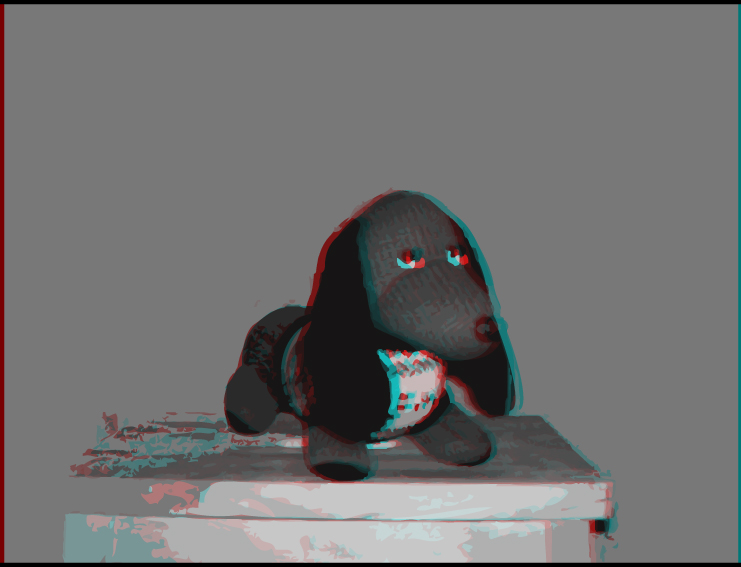
- Anaglyph
- In Illustrator choose Path > Cleanup.
- Select the right layer of your Vector Art illustration. Zoom out and make sure there no stray points or objects outside the artboard. Select the right layer from the layers palette and choose Object > Group. Repeat with the left layer.
- Use the Align tool to align to each grouped layer to the center of the artboard.
- Delete any unnecessary layers, including your template image.
- If you would like to create a larger Anaglyph image, do so at this time by selecting both right and left layers and resizing the image using the Transform Palette or Menu. Make sure Scale Stroke and Effects is turned on. Keep the original proportions when you resize.
- Create a new layer and name it Intersection.
- Using the line tool create a vertical line across the artboard. Use the Align palette to center it. Repeat with a horizontal line.
- Create another layer and name it box.
- Turn on SmartGuides and draw a rectangle from the center of the intersecting lines. Give this box a 1 point black stroke.
- Turn off the Right Layer and the Intersection layer. Export the Left Layer it as an psd (left.psd). Repeat with the Right Layer (right.psd). Choose RGB, 300 dpi, Flat Image.
- Combine both images in Anabuilder or AnaglyphMaker or use this Photoshop Anaglyph Template.
- Save file as a psd.
- More Tutorials Using Photoshop:
- Stereocard
- View in the stereoscope.
- Anaglyph
- FINAL PROJECT GRADING:
- Color or BW stereocard
- Make sure your files and CD are labeled with your full name.
- Please drop all Final Project files, including your new Anaglyph into
the dropbox. Make sure you folder is labeled with your first initial
and last name.
- jsmith_final
- Please review the Final Project Guidelines and Project Rubric.
- CRITIQUE: (10 points)
- Find a partner.
- Before critiquing your partner's final project, review the Final Project Description and Project RUBRIC to see the requirements for the project. Your critique will not effect your partner's grade, but it will effect yours.
- Give your partner constructive criticism. "It's hot" and "I like it" are not acceptable without a detailed explanation of the "hotness" and "likeableness".
- Note how the project is successful both technically and aesthetically and how it can be improved. Even if you feel the project is more successful than your own, trust your judgment and make helpful suggestions for improvement.
- Submit your critique by filling out and submitting this form for credit.
Have a great vacation! See you next semester.