2D Animation: AD540
COURSE CALENDAR | WEEK 09 CLASS OUTLINE | Homework
Topics Covered in Class:
- Animation Production Workflow: Overview (1/2 hour)
- Workflow Process
- Story Development: Every story has three main stages – Beginning, Middle and End. Screenwriters call it a three-act formula: Set-up, Conflict and Resolution.
- In the Set-up we are introduced to the Protagonist. We see enough of him to care
what happens to him. He wants something – even if it’s only to carry on being
happy. - Then he meets the Problem. This involves the antagonist (the bad guy). Immediately we have Conflict. This is the longest act, with the hero solving an
immediate problem, then finding another one in his path – in many cases it’s the
previous solution that causes the next stumbling block. - Eventually the protagonist achieves his goal and we have resolution.
- In the Set-up we are introduced to the Protagonist. We see enough of him to care
- Script: The written story of a film that supplies dialogue, camera moves, background,
staging and action.- Example scripts
- Story Overview: Animated Short | TV Pilot
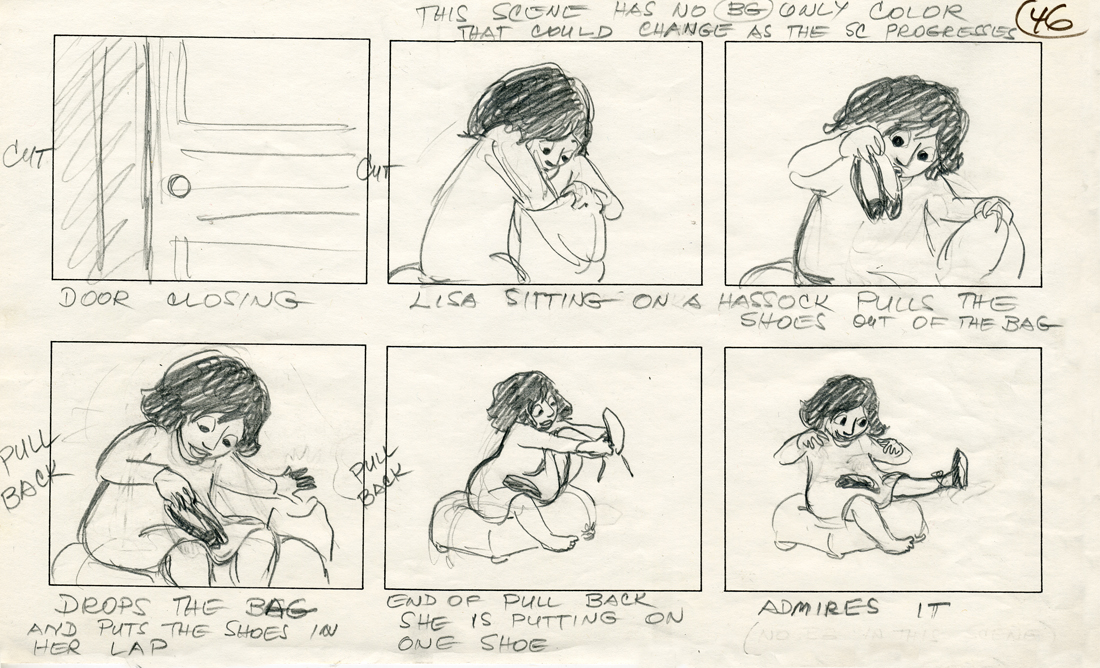
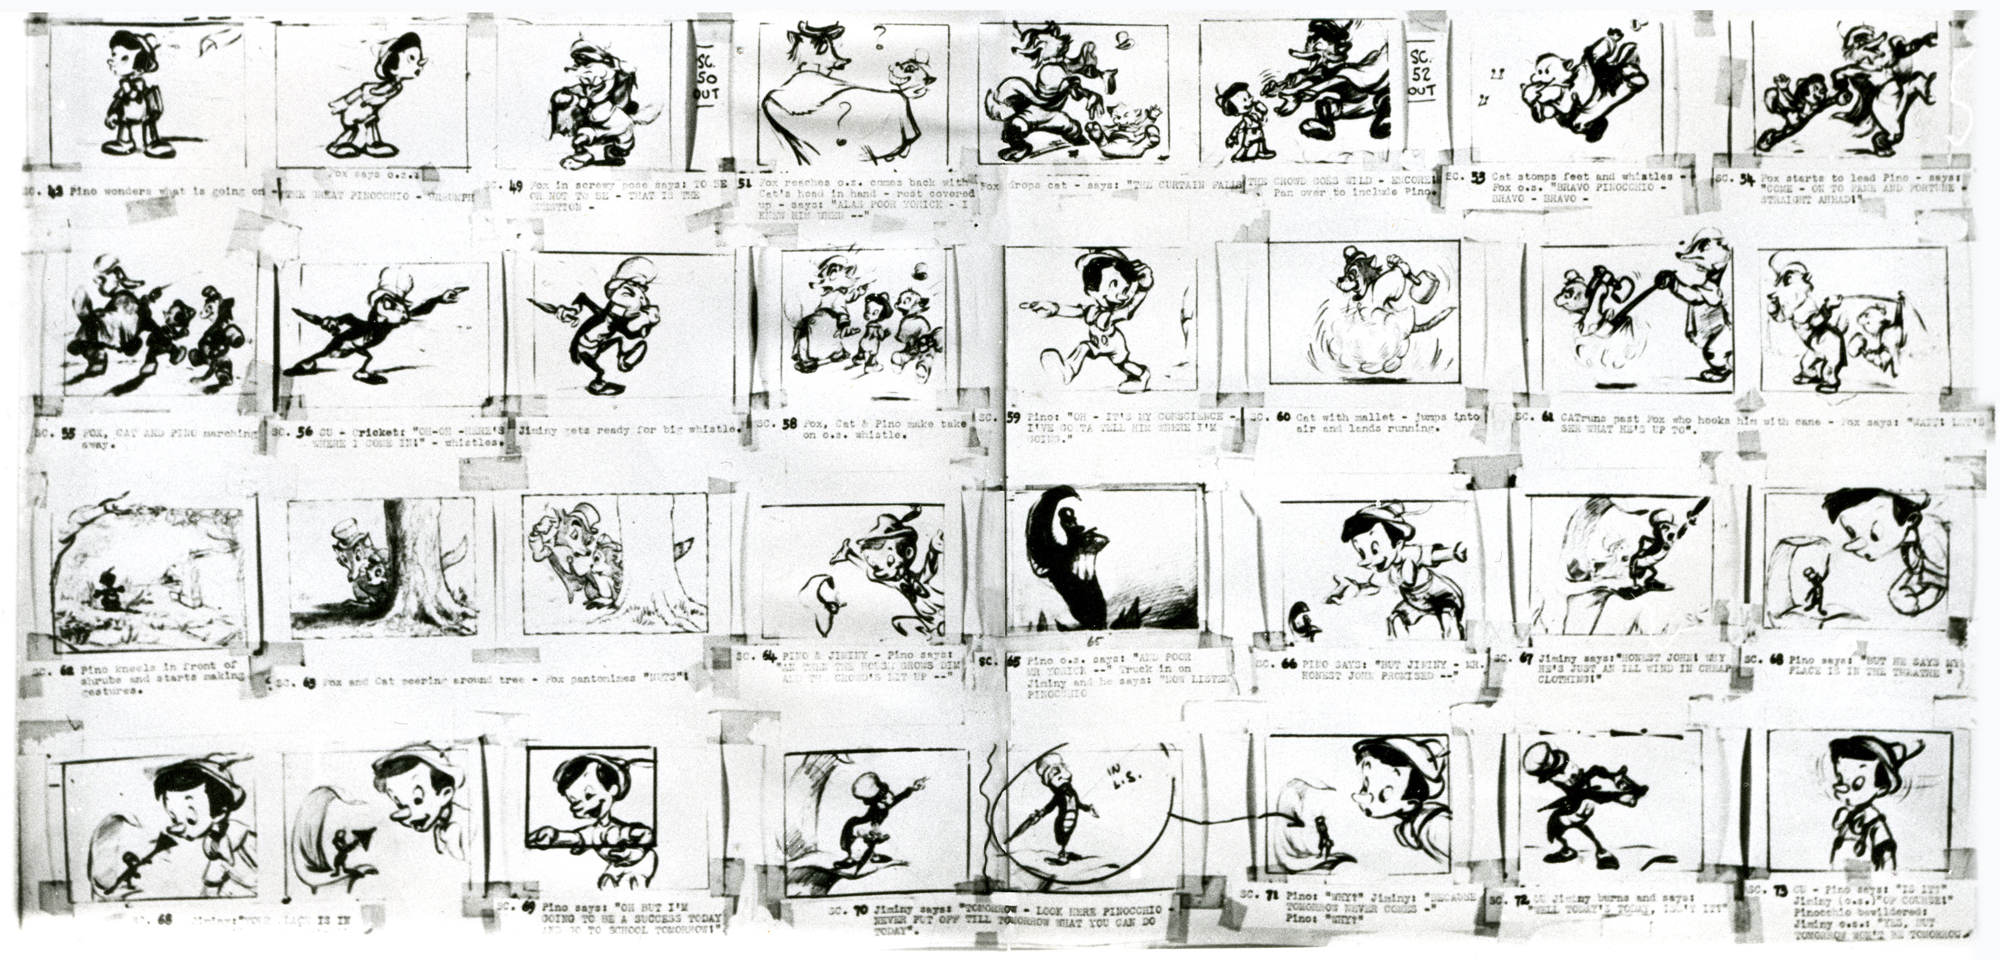
- Storyboards: A storyboard is a visual script designed to make it easier to for the director to "see" the shots before executing. It is used for movies, commercials and animation.
- Animatic: An animatic or story reel is made after the soundtrack is created, but before full animation begins. An animatic typically consists of pictures of the storyboard synchronized with the soundtrack.
- Model (Character) Sheet: A basic model sheet shows a character from all sides and gives the animator a clear idea of the character's structure and proportions.
- Activity: Brainstorming and Story Development (1 1/2
hour)
- We will be developing a complete pitch for a 3-5 minute animated short, but will only produce a small portion of the animation-- a short sequence, between 10 and 20 seconds.
- Consider a story you would like to tell. The underlying concept should be simple and straight forward and must happen in 3-5 minutes. Use a watch and act out the entire story.
- Finding Idea Exercises:
- Make a list of People, Places and Things. Choose one from each column- mix and match.
- Spoof a well-known story or historical event.
- Look at photographs in magazines – ask questions about the characters and the environment – What are they doing there? – How did they get there?
- Write about something from your family experience
- Watch people in a public place, expand the actions of two or more people into a simple story with a conflict.
- Think about a situation or event from your childhood.
- Write about an event from the point of view of a child.
- What makes you feel passionate or angry or sad?
- Make up a story from a piece of dialog or quotation
- Use a fairy tale or myth as the basis for a story
- Write a paragraph or two about the story, indicating the personality, motivation, emotional states and relationships between the character(s), the location and environment, the message and mood. In a couple of paragraphs you should be able to clearly state the aim of the story. [Example]
- Make quick, rough sketches of your character(s), props, costumes, and background scene(s).
- Storytelling Resources:
- STORY-SHAPING AND VISUALISATION
- Exercises to get you started
- 99 Ways to Tell a Story : Exercises in Style
- Comic book panels: sample | sample | sample | sample
- How I Write a Story
- Creation of a Page by Tom Hart (PDF)
- Atom Films - check out a few animated shorts and see if you can find the Set-up, Conflict and Resolution.
- Activity: Rough Storyboarding
- Start storyboarding your concept by printing out this
storyboard template.
- Here you will rough out the pacing of the complete short by breaking down your story idea into a series of shots.
- Determine what the important elements are in each shot and figure out the most effective way to convey your ideas. Think about:
- Camera Angles
- How the characters and props move within the shot
- The mood
- Number each shot and determine how many panels will be needed to explain each shot. Coordinate your script with your rough storyboard panels. Indicate dialog, sound effects, camera direction and timing.
- Your storyboard will should convey some of the following information:
- What characters are in the frame, and how are they moving?
- What are the characters saying to each other, if anything or how are they interacting?
- How much time has passed between the last frame of the storyboard and the current one?
- Where the "camera" is in the scene? Close or far away? Is the camera moving?
- Storyboard Language
- CLOSE-UP SHOT: A close range of distance between the camera and the subject.
- DISSOVLE: A transition between two shots, where one shot fades away and simultaneously another shot fades in.
- FADE - A transition from a shot to black where the image gradually becomes darker is a Fade Out; or from black where the image gradually becomes brighter is a Fade In.
- HIGH CAMERA ANGLE: A camera angle which looks down on its subject making it look small, weak or unimportant.
- JUMP CUT: A rapid, jerky transition from one frame to the next, either disrupting the flow of time or movement within a scene or making an abrupt transition from one scene to another.
- LEVEL CAMERA ANGLE: A camera angle which is even with the subject; it may be used as a neutral shot.
- LONG SHOT: A long range of distance between the camera and the subject, often providing a broader range of the setting.
- LOW CAMERA ANGLE: A camera angle which looks up at its subject; it makes the subject seem important and powerful.
- PAN: A steady, sweeping movement from one point in a scene to another.
- POV (point of view shot): A shot which is understood to be seen from the point of view of a character within the scene.
- REACTION SHOT- 1.: A shot of someone looking off screen. 2.: A reaction shot can also be a shot of someone in a conversation where they are not given a line of dialogue but are just listening to the other person speak.
- TILT: Using a camera on a tripod, the camera moves up or down to follow the action.
- ZOOM: Use of the camera lens to move closely towards the subject
- Storyboarding References:
- Start storyboarding your concept by printing out this
storyboard template.
- Activity: Digital Storyboard and Animatic in Storyboard Pro
- Set up your Storyboard Pro document using the NTSC template.
- Using your script and rough storyboard panels as a guide, create your storyboard using the Storyboard Pro drawing tools. You will go back and create a polished storyboard after you have figured out the timing and camera movements for your overall story.
- Typically a shot can be expressed in one panel, but it may be necessary to use more than one panel to explain complex shots, actions, locations, or points of view. Generally, use a new panel for each new action.
- Start out by creating the major points or "BEATS" in your story. For a short animated story, with only a few sequences, you might simply create the set-up, conflict, and resolution shots first and then go back and add additional shots and panels, as necessary.
- After completing your storyboard, rename your first shot as 1 and choose Renumber Shot from the Renaming Rule pulldown. Export your storyboard as a PDF (3 panels horizontal) and your Animatic as Quicktime Movie (quarter size)
- Storyboard Pro Tutorials / Resources
- Complete the following 3 tutorials. There are several parts to each tutorial.
- Presentation Overview
- Creating a Storyboard: Introduction, Scanned Images, Drawing Tools, Templates
- Creating an Animatic: Introduction, Camera, Transform Layers, Timeline
- Review Documentation to find answers
- Complete the following 3 tutorials. There are several parts to each tutorial.
- Independent Review with Prof. Spevack (10 minutes
each group)
- Discuss Final Animation project idea
Please have the following prepared for the next class:
- Bring in your Digital Storyboard and Animatic.
- Bring in developed sketches of your main characters, backgrounds and props. Have them SCANNED and saved to a CD or drive.