September 27, 2018
Materials Need for Class:
- Sketchbook
- Pencils (wide range from 4h to 4B)
- Inking pens (new- if you ran out)
- 9×12″ Bristol
Due this class:
- Bring your Glossument book, inking pens, pencil, and/or other materials available to work in class.
- Have your Project #2: Phase 1 posted to the class blog and ready for discussion.
- Complete your Field Trip post. See Class Blog for details.
Field Trip Feedback (15 min)
- Tactile Orchestra
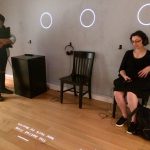
- Seated Catalog of Feelings
- Scent Fountain: Fear and Volatile Marilyn
Glossument Work (1 hour)
- You will choose one word from the reading, Saint-Exupery, Antoine de. “The Tool.” Wind, Sand and Stars. 1939. New York: Harcourt Brace, 1967. 41-47.
- Create a new Glossary entry on the class blog, following the ENG1101 guidelines.
- Create a “2-page spread” in your Glossument, using any materials or methods you wish. On one page, write the word and on the opposite page, visualize the word.
- You have 1 hour to complete this task.
Demo/Discussion (15 minutes)
- Review Project #2: Phase 1 posts
- Thumbnail sketches How and Why (Video)
- Thumbnail sketching is important, because it’s a beginning place for brainstorming ideas. It allows you to quickly get your ideas down on paper. This should happen before you jump on the computer and go with the first concept that comes to mind. Thumbnail sketches are part of the Design Process. If an idea or message doesn’t work well in a sketch then it’s unlikely to work in a final design.
Lab: Phase 2 – Define (1 hour)
1. Pattern Mashup PREP: Staccato / Legato
Take out a soft pencil #3B and your sketchbook.
Rhythmic Line Test 1: Listen to this song: Another One Bites the Dust and draw a line representing its rhythm across your first sheet of paper. Repeat and refine until you get a variety of interesting lines. How would you describe these lines?
Rhythmic Line Test 2: Listen to this song: Summertime and draw a line representing its rhythm across your second sheet paper. Repeat and refine until you get a variety of interesting lines. How would you describe these lines?
Patterns Squares: Now create at least 12 thumbnails: 6 for Staccato and 6 for Legato. Using your rhythmic line tests as a guide, create 6 patterns that represents STACCATO and 6 patterns that represents LEGATO.
- Continue to refine these patterns. Try varying the line weight (thick and thin) and the spacing (tight and wide) between the lines. Let the rhythm of the music dictate the look and feel of your patterns.
- Once you have created at least 4 strong pattern squares (2 Staccato and 2 Legato) move on to the next step…
2. Inked Mashup > Create a Layout Grid
Homework
- Attend the Grace Gallery opening– right after this class!
- Imported from Brooklyn
City Tech Alum, Antonio Di Spinga Retrospective
Opening Reception: Thursday, September 27th
Grace Gallery 5:30pm to 8:30pm
- Imported from Brooklyn
- Complete Staccato / Legato Pattern Mashup PREP and Layout Grid (Phase 2: Define).
- Materials needed next class: Sketchbook and variety of pencils, inking pens, 9×12″ bristol, ruler.


