Homework Due THIS CLASS
- Finish your Pattern Mashup mockups using the modular grid provided in class. [Modular Grid – 11″x17″ paper )
- Contribute to the Visual Library. Consider adding an image that demonstrates a grid-based layout.
Materials Needed For THIS CLASS
- sketch book
- tracing paper (9″x12″)
- bristol pad (9”x12”)
- Pigma Micron inking pens (size .02 and .05)
- Faber-Castell Pitt Big Brush Pen or Pigma Micron brush
- graphite drawing pencils (6B, 2B, HB, 2H, 4H)
- eraser
- 1 roll removable tape
- metal ruler
- your favorite song or piece of music & headphones
Visual Library (15 min)
Everyone should be participating. Let’s designate a facilitator and take a look at your new Visual Library posts with an eye on grid-based layouts.
Discussion (20 min)
Modular Grid Review
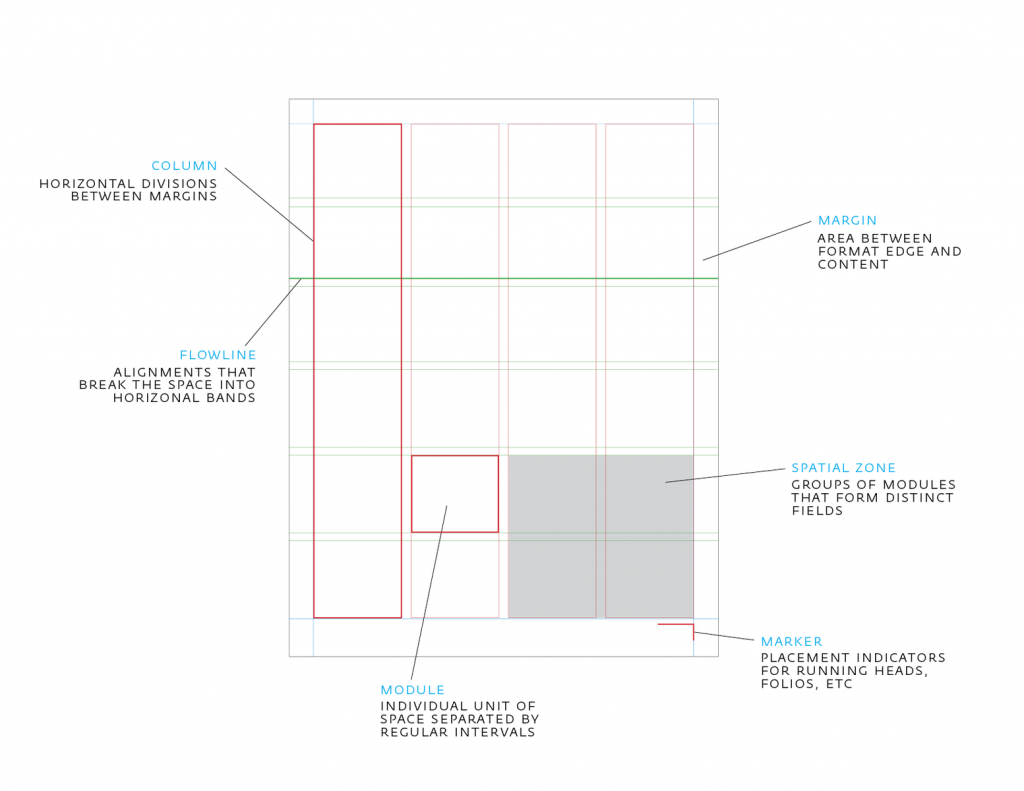
A grid is a tool that helps a designer organize information to provide a sense of unity, consistency, rhythm, and hierarchy in their compositions.
- Column: Horizontal Divisions
- Flowline or Hangline: Horizontal divisions, content can “hang” from a common line.
- Margin: Area between frame edge and content
- Module: Individual unit
- Spatial Zone: Groups of modules
- Marker: Placement indicator for repeating page elements

How are pattern and rhythm used in design?
- Regular pattern repeats elements in timed or predictable intervals.
- Progressive pattern repeats elements, but changes in size or color to create progressive steps.
- Flowing patterns are organic or natural feeling patterns that create movement
Lab: Pattern Mashup Mockups
Iterate
Create multiple mockups of your Pattern Mashup composition to get a sense of how your patterns will work within a grid layout.
From your collection of refined patterns and textures, choose 2-5 that best represent the sounds in your favorite piece of music.
Using the modular grid template provided and several sheets of tracing paper, sketch out how each pattern or texture will fit within the grid.
Organize your patterns and textures to communicate the mood, feeling-experience, and rhythm of your favorite piece of music.
Use each pattern at least twice, varying size and orientation, to create a sense of rhythm and to help unify the composition.
Keep iterating until to you find the best solution!
Critiques with Professor
Before you start inking your Pattern Mashup on bristol, present your final Pattern Mashup mockup for review.
Lab: Inking
Transfer Your Grid to Bristol
- Choose your best Pattern Mashup mockup to use as a guide.
- Trace (using the light table) or measure and lightly redraw the final grid and patterns onto a piece of bristol.

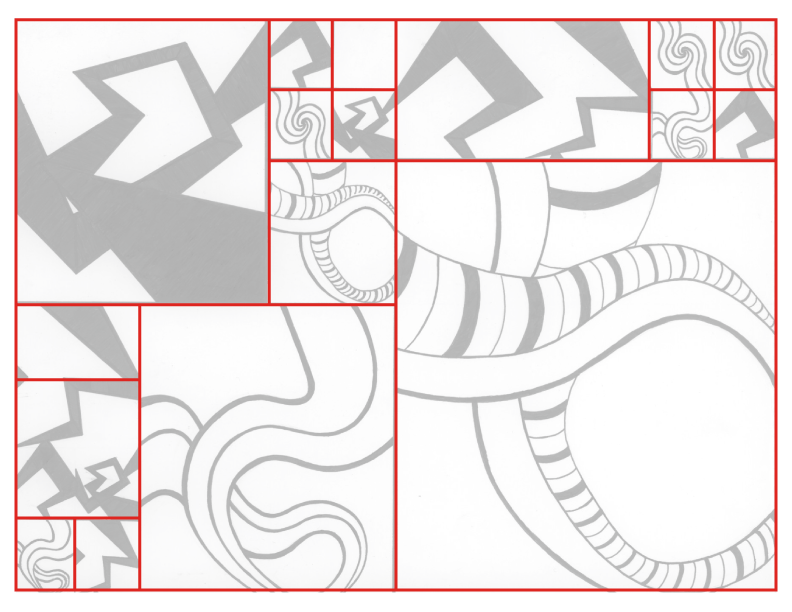
Grid Structure 
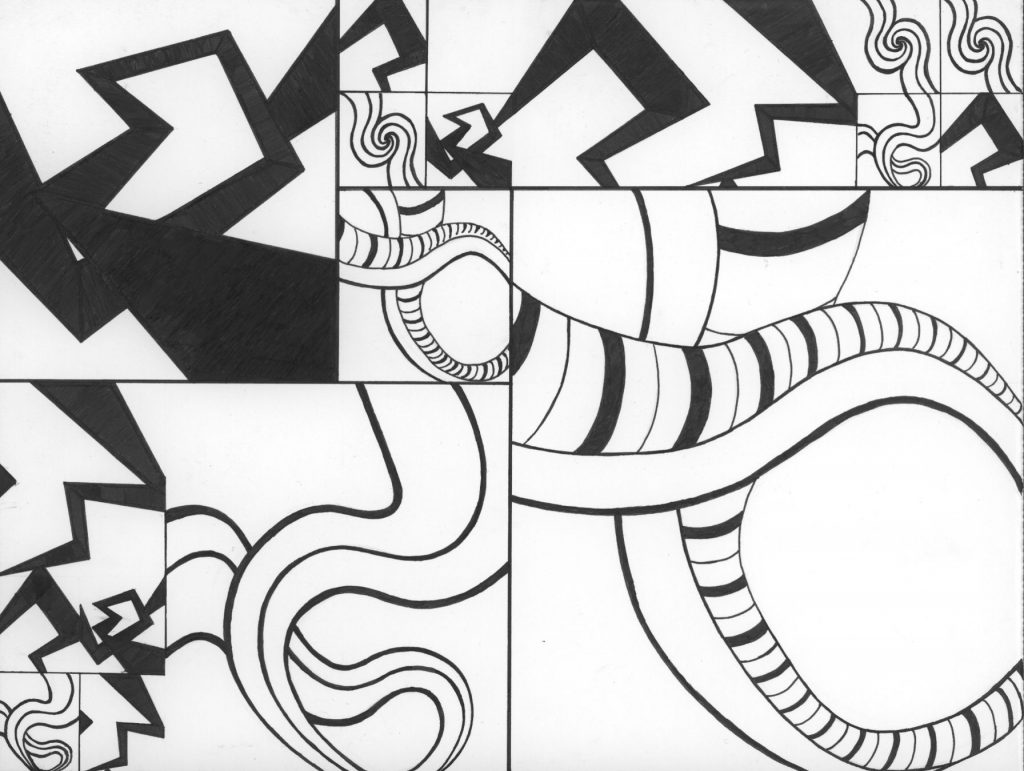
Daniel’s Final Pattern Mashup
Ink Your Pattern Mashup
- Ink: Carefully ink your final composition using inking pens. If you’d prefer to use bottled ink and pen, please do.
- Tidy up: Erase all extraneous pencil lines and measurements. The final work should be neat, clean and well-presented.
- Document: When you are finished, take a well-lighted, well-composed photograph of your inked composition. Use this guide to avoid common mistakes when photographing your work.
- Protect: Package and protect your work using tracing paper (refer to class demo).
Homework Due NEXT CLASS
- Project #2: Pattern Mashup is DUE. Come prepared to present your inked Pattern Mashup to the class for critique.
- Submit Project #2 to the Ways of Seeing class blog. See Project #2 > Submitting Your Work for details.
- Contribute to the Visual Library. Consider adding an image that demonstrates Visual Rhythm.
Materials needed for NEXT CLASS
- sketch book (9″x12″)
- graphite drawing pencils (6B, 2B, HB, 2H, 4H)
- eraser (magic rub, mars, gum or similar)
