Web Design: AD550
TECHNICAL SUPPORT | Creating a Mockup Interface / Design Grid
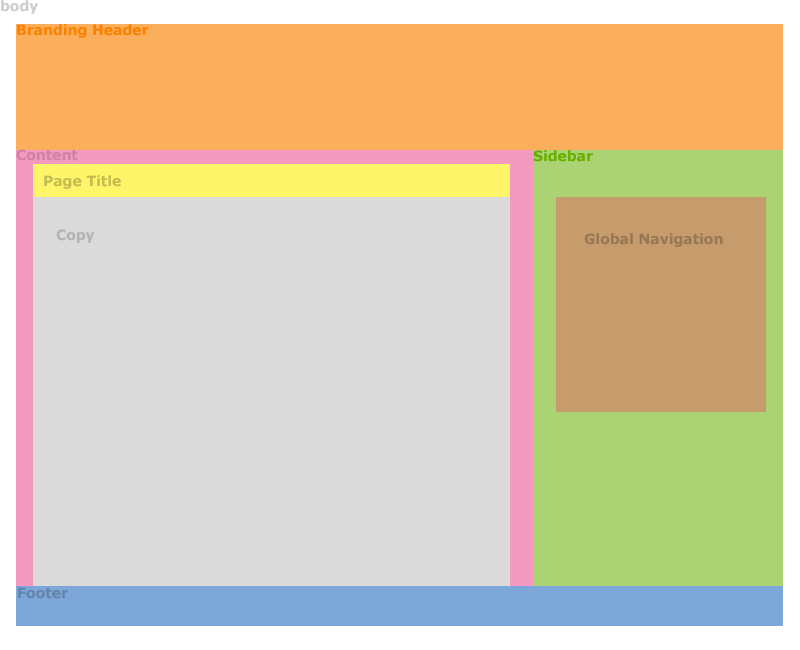
- Use this mockup as a guide.
- Create a new document in Photoshop or Illustrator. Go to File > New
- Set the following document settings:
- Size: 800x650
- Resolution: 72 pixels/inch
- Mode: RGB
- Contents: Transparent
- Copy and past this wireframe template into your document.
- Open your layers palette: Window > Layers.
- Create and name separate layers for each part of your design grid:
- Body (background color or pattern)
- Branding / Header (Logo and Site Title)
- Sidebar
- Global Navigation
- Content
- Section Heading (h2)
- Copy (sub-headings, paragraphs, lists, bullets and inline links)
- Footer (copyright and email link)
- Turn on your Rulers: Window > Show Rulers
- Use guides to define the sections of your design grid. Click on the Move Tool in the Tool palette and drag a horizontal and vertical guide from each ruler.
- Sizes for each structural part of your design grid:
- Body 800x650
- Container 767 wide
- Branding / Header 767x126
- Sidebar 767 wide
- Content 767 wide
- Footer 767x40
- The mockup should show the client how the final interface will look. Specify logo, color scheme, fonts and positioning. (example)
- Branding / Header: Create a logo, photograph or digital image to identify the "brand" of your site. This should also embody your Site Persona, work with your color scheme, and define your graphic style. The branding area is 767px wide by 126px high (the height can be adjusted to your choice). Using the text tool add the name of your site. In this case, it's Your Name.
- Choose or create a subtle pattern for the body background of your mockup. This is the area outside of the area that contains your site components.