TECHNICAL SUPPORT | Creating a Mockup Interface / Design Grid
- Use this wireframe template as a guide.
- Create a new document in Photoshop or Illustrator. Go to File > New
- Set the following document settings:
- Size: 800x650
- Resolution: 72 pixels/inch
- Mode: RGB
- Contents: Transparent
- Open your layers palette: Window > Layers.
- Create and name separate layers for each part of your design grid:
- Body (background color or pattern)
- Branding / Header (Logo and Site Title)
- Sidebar
- Global Navigation
- Content
- Section Heading (h2)
- Copy (sub-headings, paragraphs, lists, bullets and inline links)
- Footer (copyright and email link)
- Turn on your Rulers: Window > Show Rulers
- Use guides to define the sections of your design grid. Click on the Move Tool in the Tool palette and drag a horizontal and vertical guide from each ruler.
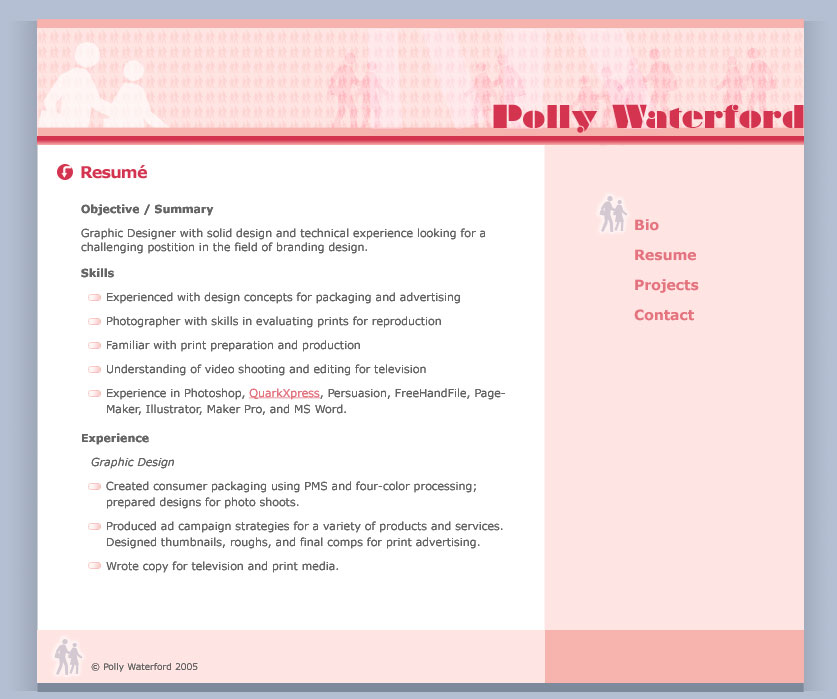
- Sizes for each structural part of your design grid:
- Body 800x650
- Branding / Header 767x126
- Sidebar 767x250
- Content 767x517
- Footer 767x40
- Use the Photoshop or Illustrator tools to create your mockup. The mockup should show the client how the final interface will look. Specify logo, color scheme, fonts and positioning. (example)
- Once you have finalized the your mockup you are ready to optimize your images. Save the original just in case you need to come back and make corrections.
- Save another copy called mydocument_slices.psd.
- If you are working from Illustrator make sure your layers are organized and choose File > Export to save as a Photoshop Document. Open in Photoshop to continue.