2D Animation: AD540
COURSE CALENDAR | WEEK 10 CLASS OUTLINE | Homework
Topics Covered in Class:
- Principles of Animation: (.5 hours)
- Characterization and Acting
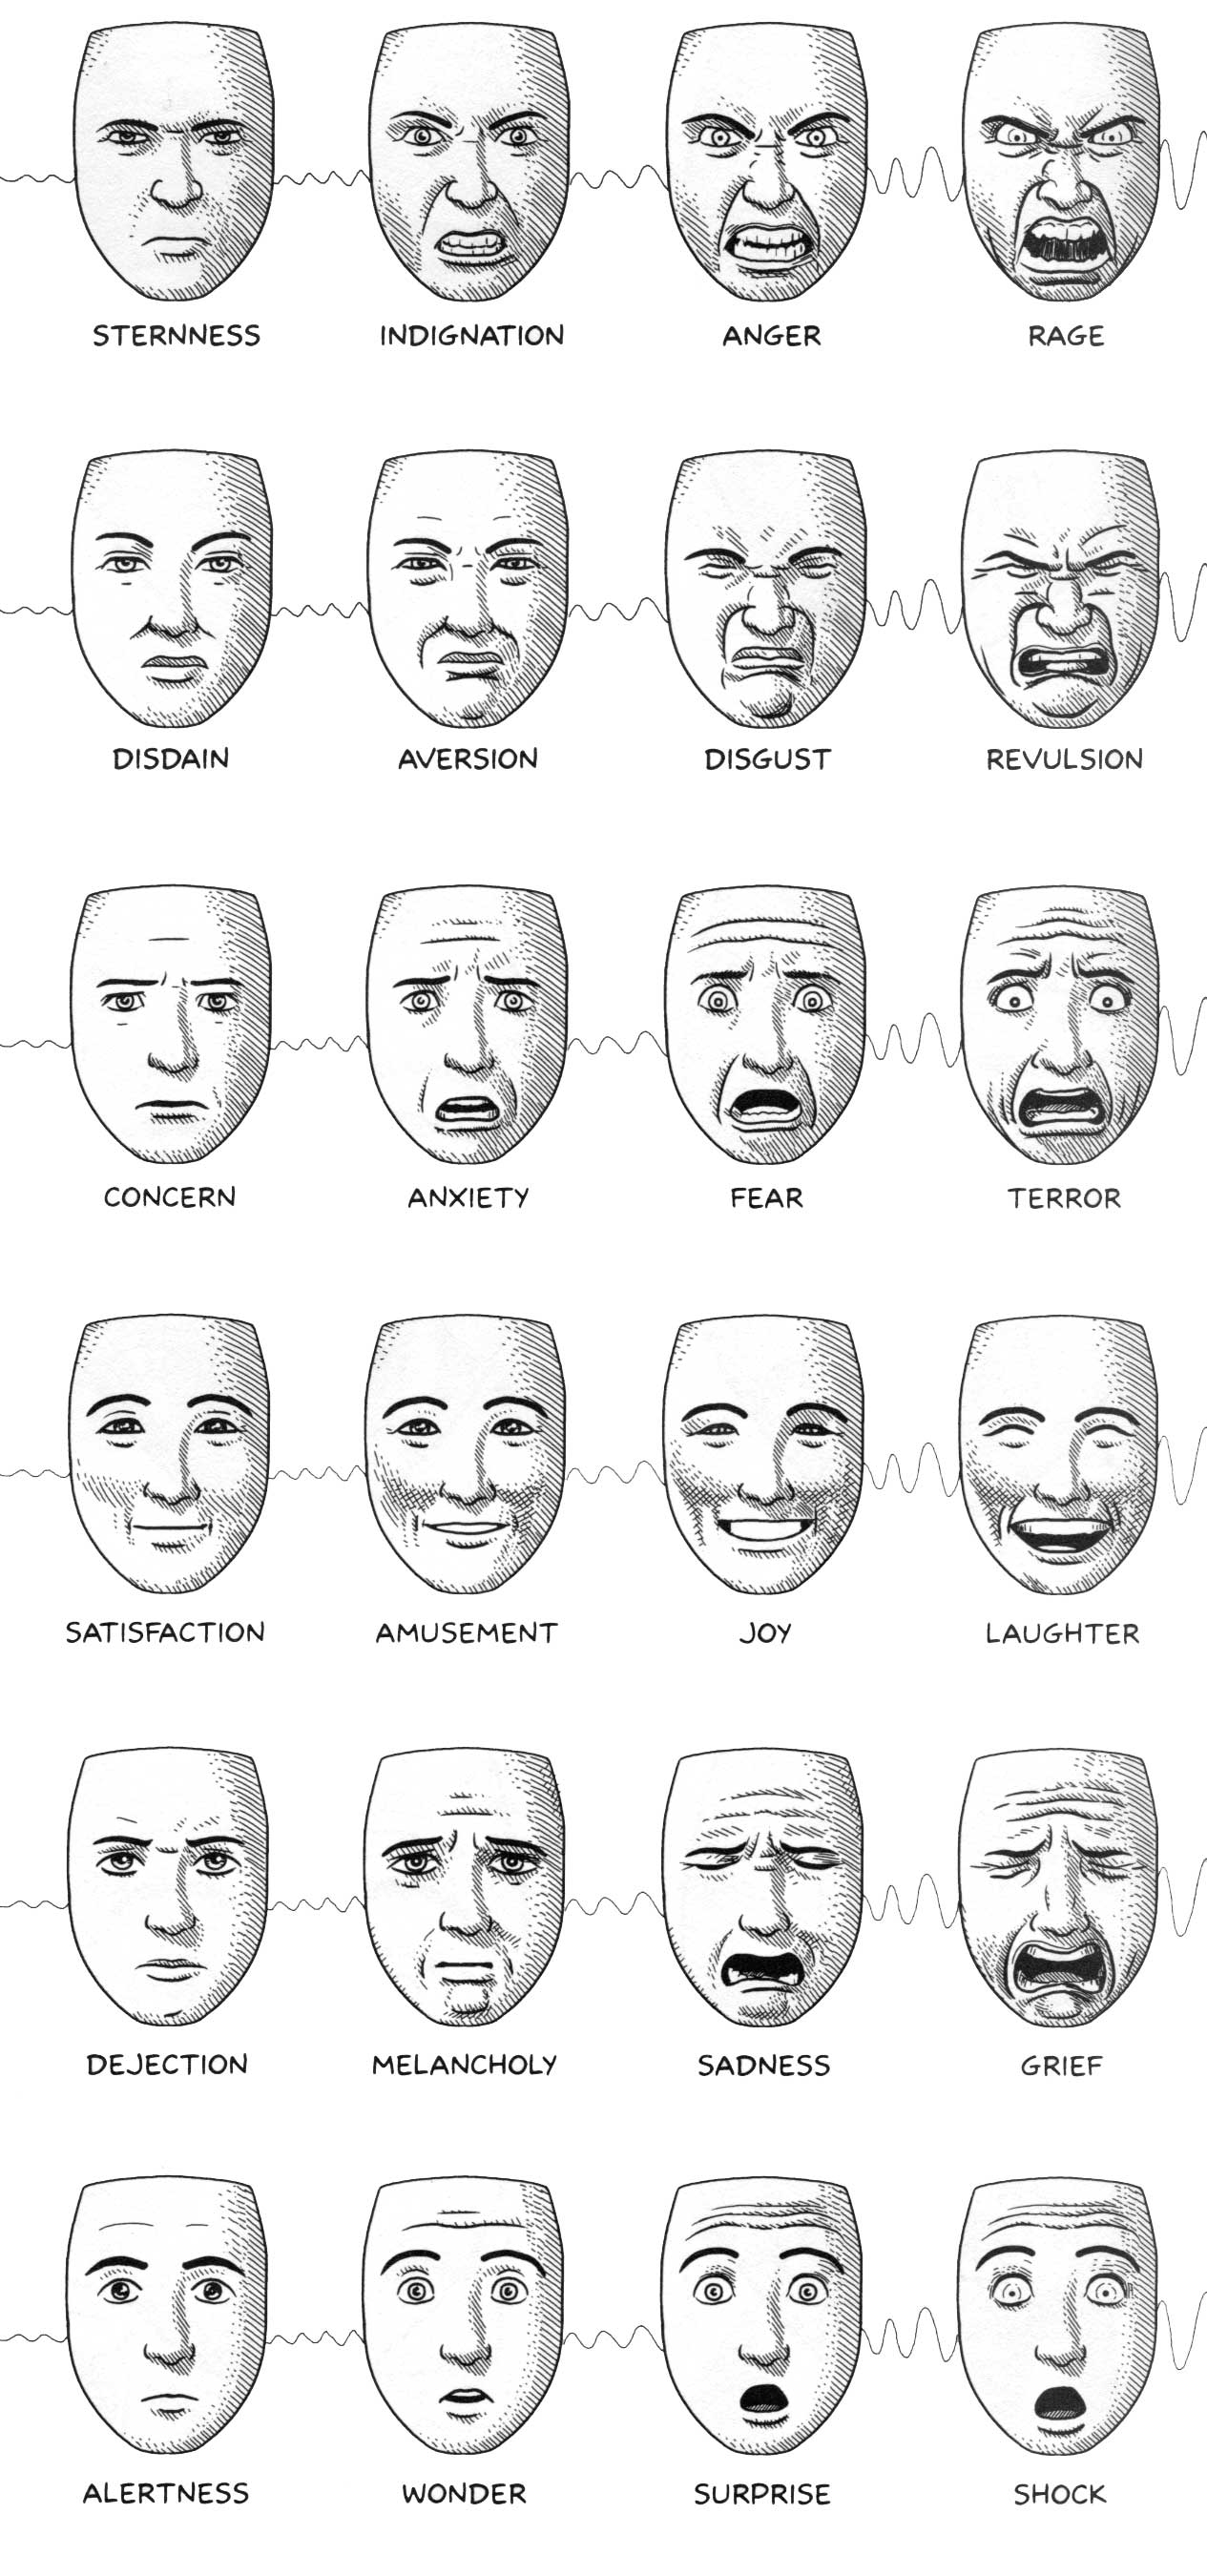
- Characterization is how we impart personality into our animations. The key to successful characters is their believability. Believability can be achieved through physical and psychological design
- The designer must know and believe in her character in order to emotionally engage the audience. Characters engage the audience by expressing themselves through temperament and acting.
- There are two types of acting, psychological and physical. Physical acting depends more on the physical actions of the character and less on thoughts or emotions. It is generally more limited in range and often found in cartoon or slapstick comedy. Psychological acting and actions are expressive thoughts and emotions and are often less dynamic and more refined. This type of acting depends on subtle phrasing and animation timing.
- Temperament and Pace
- The pace of the animation is set in the storyboard and the animatic. These will set the narrative dynamic of the sequence. The animation and sound track will help develop the performance of the character
- The temperament of the character is expressed via the pace and tempo of the action and overall scene. A slow moving sequence is used to show tension, sadness or suspense, but if the pace of the animation is fast the dynamic will be lost. Or visa versa, if you are trying to generate excitement, danger or comedy using fast movements or cuts, the dynamic will be ruined if the character is moving slowly.
- Getting to know you character
- Create a character bio to "get to know" your character. Think about what your character would do in different types of situations.
- Include the following:
- Age
- Sign
- Species
- Sex
- Marital status
- Height
- Colour
- Distinctions
- Origin
- Accent
- Job
- Description
- Hobbies
- Role in story
- Developing your character's visual style
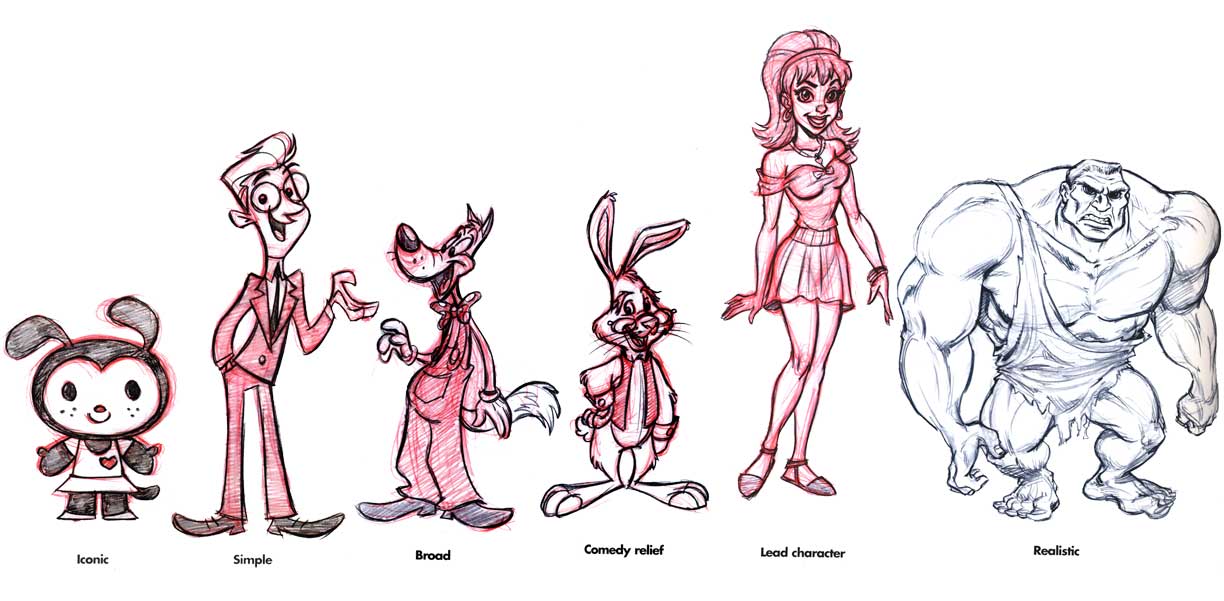
- When developing your character, think about the role (purpose) of the character in the story. The lead character will generally need to act (show emotion). This type of character must be drawn with fairly realistic proportions and an expressive face.
- Types of character styles:
- Iconic
- Simple
- Broad
- Comic
- Lead
- Realistic
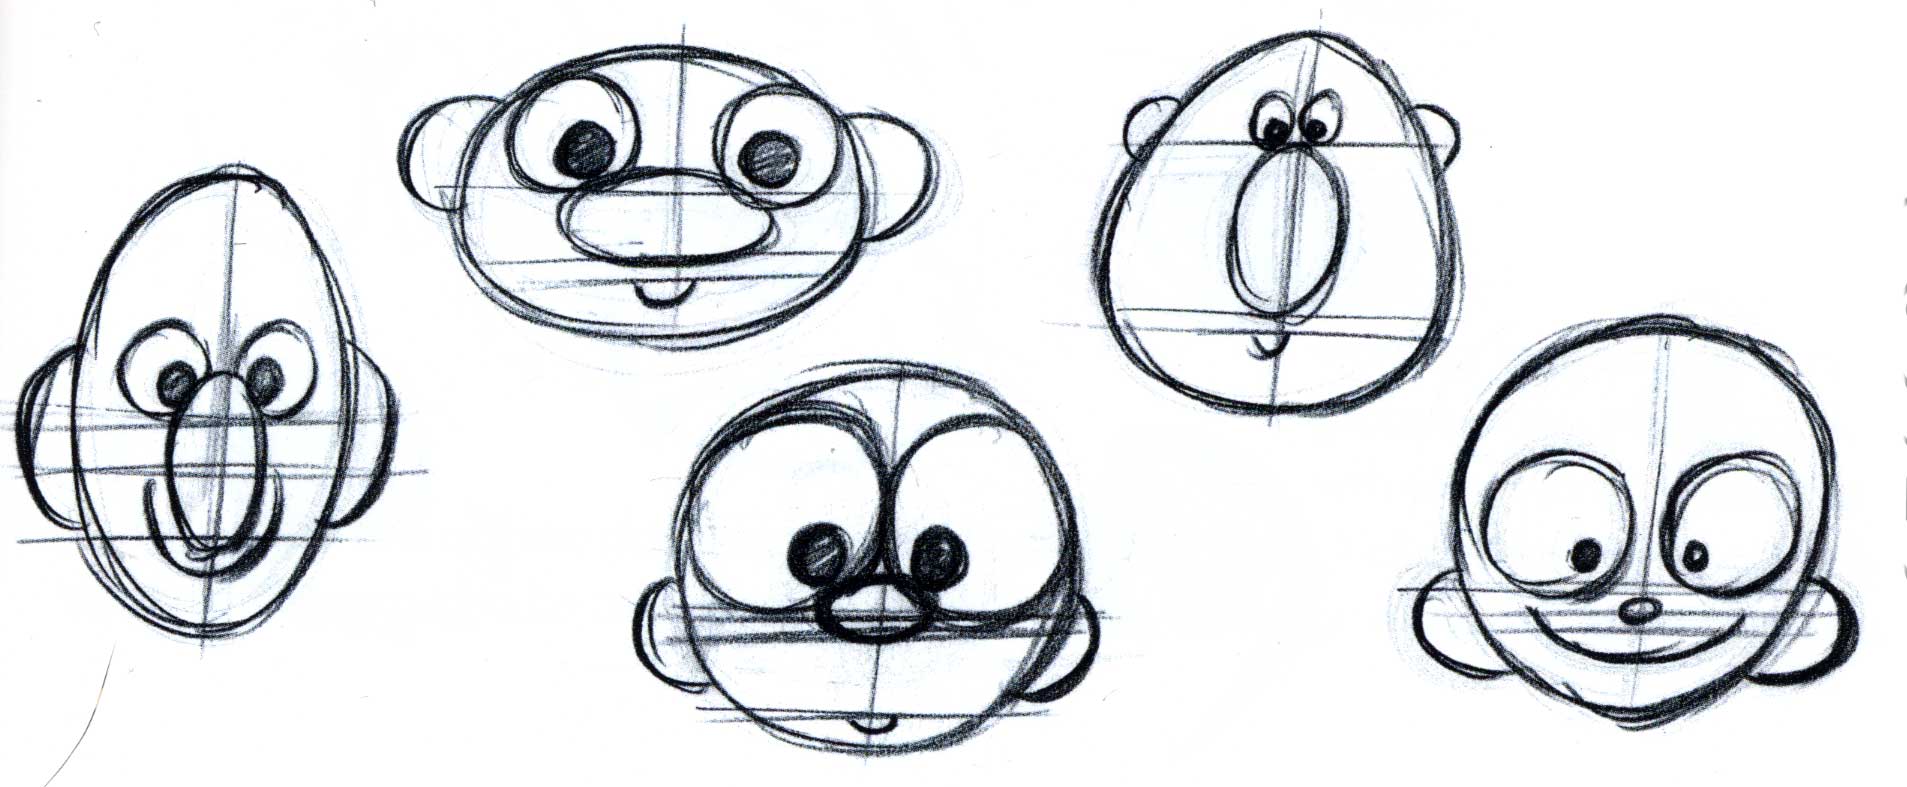
- Shape Symbolism
- Circles: generally good, friendly characters
- Squares: usually dependable, solid characters or the "bouncer" bully type.
- Triangles: often sinister, "bad guy" characters.
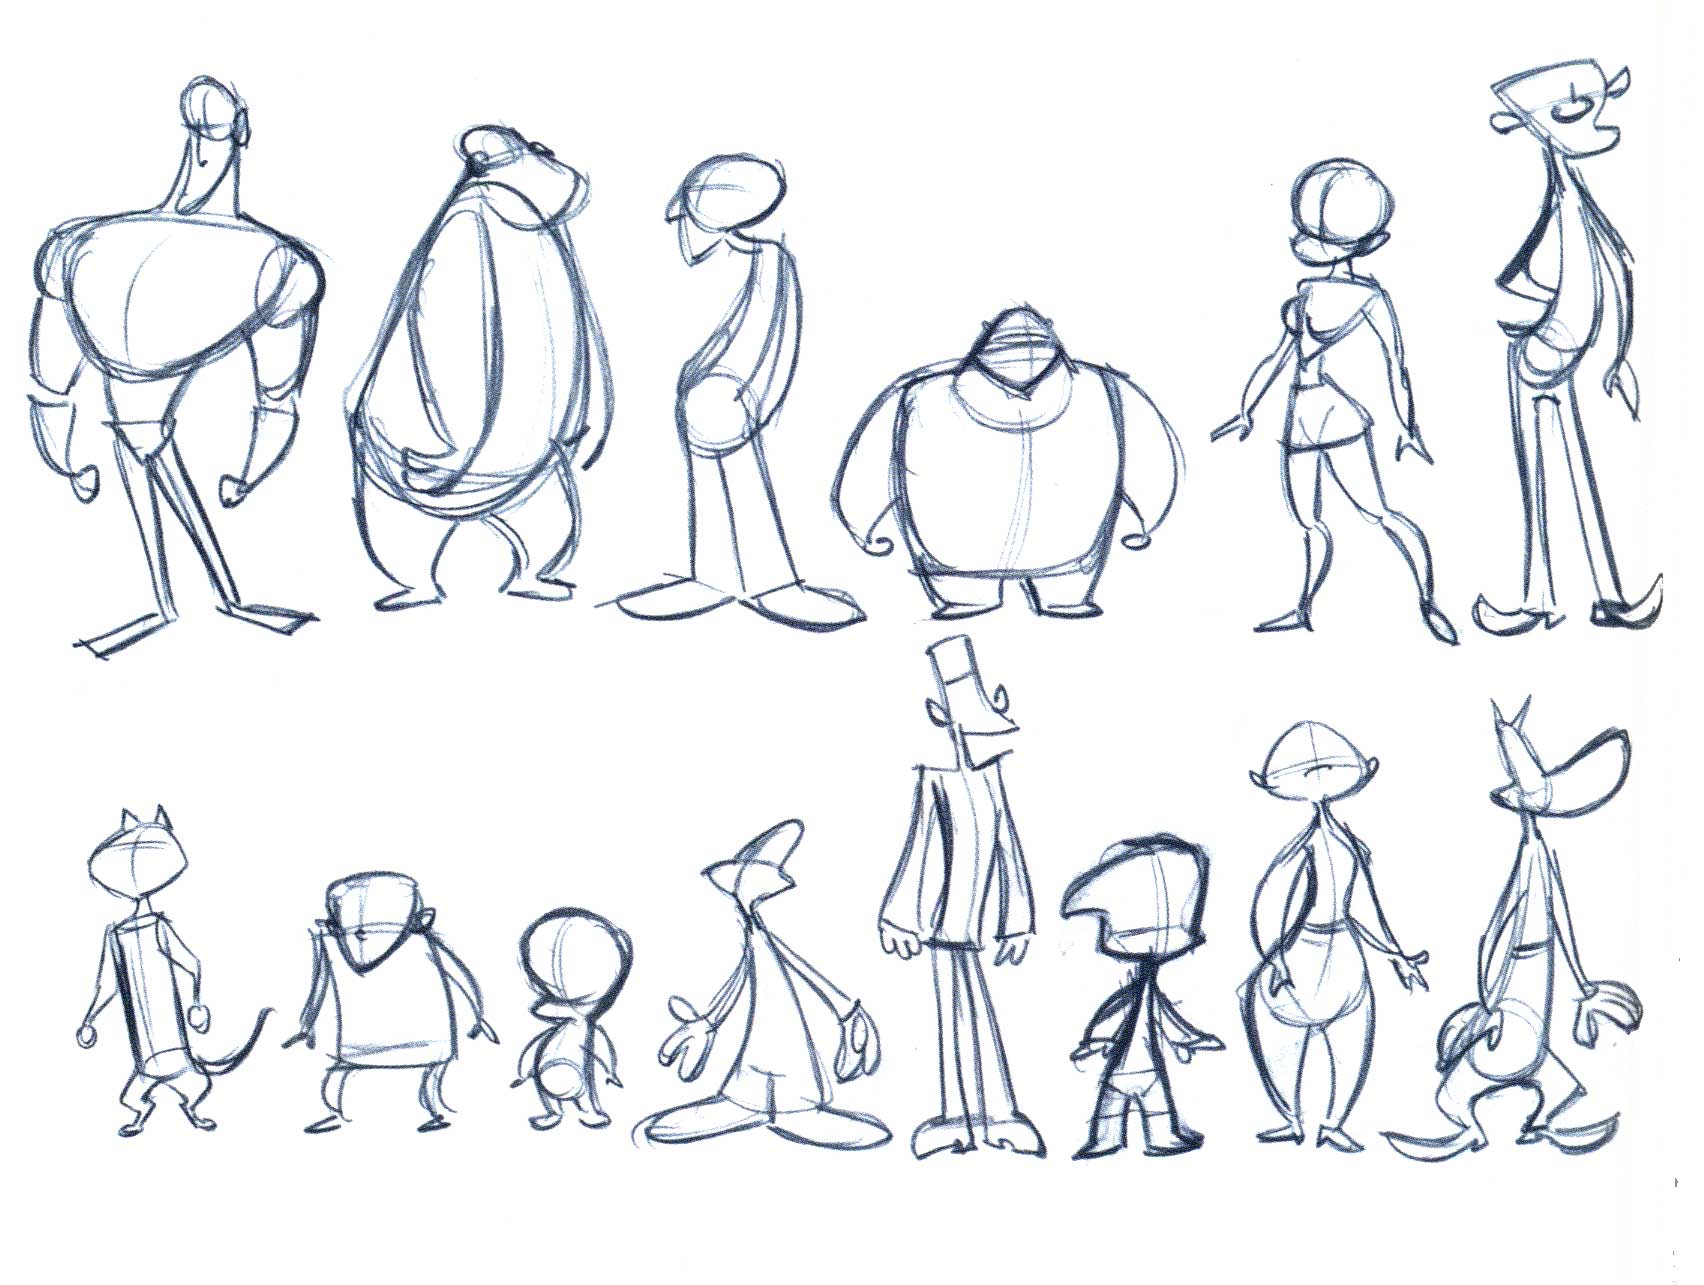
- Size, Proportion, and Expression
- Characterization and Acting
- Learning Activity: Creating a Model Sheet for your main characters
(1.5 hours)
- In order to keep consistency, artists need to define very specific attributes for each animated character, including color, shape, volume, clothing, accessories, etc. The model sheet will help animators stay "on model".
- Use Illustrator to create a model sheet with your main character and props. We will also be using the model sheet to bring our characters into Flash.
- Follow the guidelines below:
- Create your character on paper, scan it and place it on a template layer in Illustrator.
- Think about which parts of your character will move.
- Keep your characters simple.
- Create a series of color swatches for each character and prop you make.
- Present your character from front, side, 3/4, and back views.
- If more than one character will be used in a sequence create a size relationship chart to ensure that your characters don't change size and proportion throughout the animation.
- You might also create a construction sheet. This indicates how the character is constructed using basic shapes and drawing techniques.
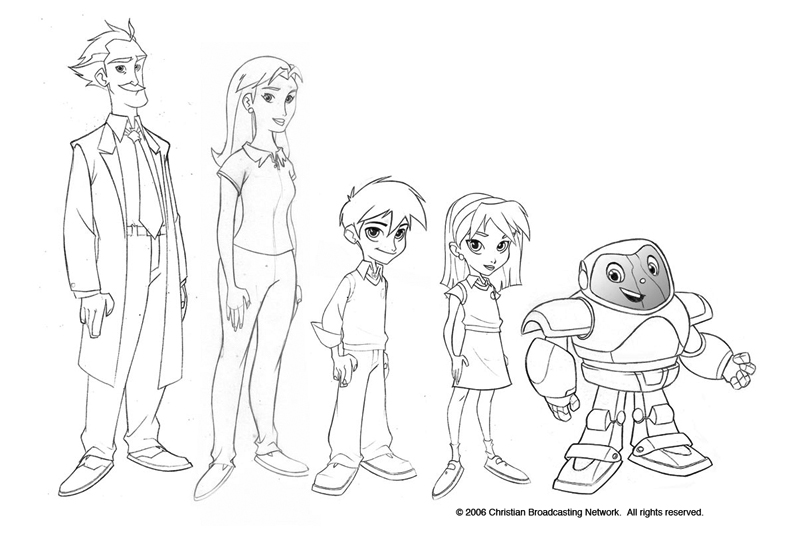
- Model Sheet example
- Construction Sheet example
- Size Relationship example
- Learning Activity: Finish Storyboard and Animatic in Storyboard Pro
(1 hour)
- Set up your Storyboard Pro document using the NTSC template.
- Using your script and rough storyboard panels as a guide, create your storyboard using the Storyboard Pro drawing tools. You will go back and create a polished storyboard after you have figured out the timing and camera movements for your overall story.
- Typically a shot can be expressed in one panel, but it may be necessary to use more than one panel to explain complex shots, actions, locations, or points of view.
- Start out by creating the major points or "BEATS" in your story. For a short animated story, with only a few sequences, you might simply create the set-up, conflict, and resolution shots first and then go back and add additional shots and panels, as necessary.
- After completing your storyboard, rename your first shot as 1 and choose Renumber Shot from the Renaming Rule pulldown. Export your storyboard as a PDF (3 panels horizontal) and your Animatic as Quicktime Movie (quarter size)
Please have the following prepared for the next class:
- Bring in your finished Model Sheets, Animatic and Storyboards.
- Review these two tutorials for Character Animating in Flash: