Course / Level: Graphic Design Principles 1 / Freshman Foundation
Problem: Create a black and white composition using a variety of marks to demonstrate an understanding of visual rhythm, repetition, and pattern. With these compositions we will attempt to visualize sounds and uncover the relationships between the auditory rhythms that we hear and the visual rhythms that we see.
Materials: Sketchbook, pencils, inking pens, Bristol Board 9×12″, exacto knife, ruler/t-square
Concepts: Line, Rhythm, Repetition, Variety, Pattern, Unity, Grid, Rule of Thirds, Economy
Technical Skills: thumbnail sketching, mark-making, draughmanship with ruler/t-square, inking pens, exacto knife, digital imaging, animation
References: Anita Lillie | Wassily Kandinsky & Music | Pattern in Nature
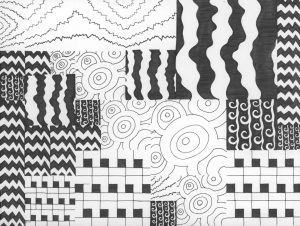
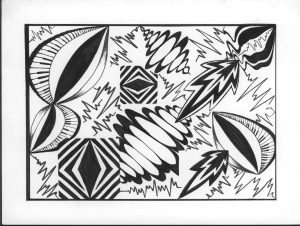
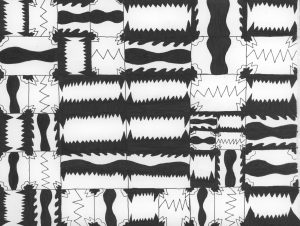
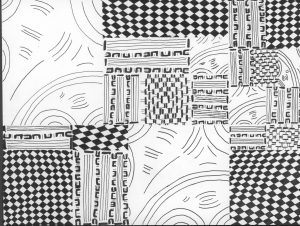
Student Work:
ANIMATED MASHUPS (WITH AUDIO)
INKED MASHUPS
-

- Student Work: Daniel
-
- Student Work: Amy
-
- Student Work: Connie
-
- Student Work: Geovanny
-
- Student Work: Jasmine
-
- Student Work: Rashad
-
- Student Work
-
- Student Work
-
- Student Work
-
- Student Work: Geovanny
-
- Student Work: Ronald
-
- Student Work: Lingen
Design Process:
Phase 1: Discover
Listening
- Listen to your favorite piece of music.
- Imagine what the sounds and patterns you hear look like and consider how they relate to each other.
Writing
- Compose a minimum 2-paragraph description of the sounds you hear.
- Describe them in terms of pattern, line, shape. Consider how some sounds repeat to create rhythm.
- Are some sounds rough or sharp and other smooth and flowing?
- Do any of these observations affect how you understand the meaning of the music or the intention of the composer/songwriter/artist?
Documentation and Feedback
- Create a new blog post called Sound Visualizations: Phase 1.
- Add a link to the piece of music that you listened to via YouTube, SoundCloud, or similar.
- Refine your writing and add it to the post.
- Include the hours that you worked on this part of the project.
- Don’t forget to comment on at least 3 other student’s posts.
References: Class 7
Phase 2: Define
Staccato / Legato Pattern Mashup Prep
- Take out a soft pencil #3B and your sketchbook.
Rhythmic Line Test 1: Listen to this song: Another One Bites the Dust and draw a line representing its rhythm across your first sheet of paper. Repeat and refine until you get a variety of interesting lines. How would you describe these lines?
Rhythmic Line Test 2: Listen to this song: Summertime and draw a line representing its rhythm across your second sheet paper.Repeat and refine until you get a variety of interesting lines. How would you describe these lines?
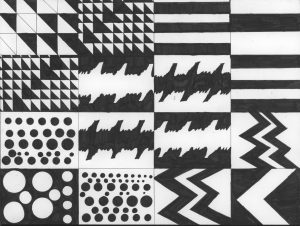
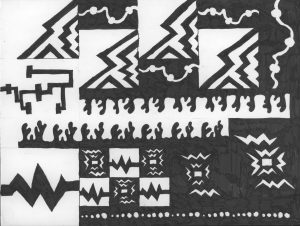
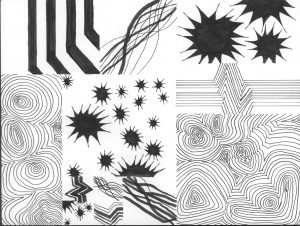
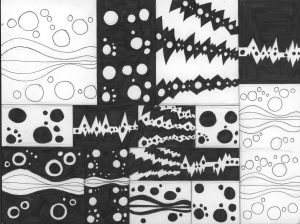
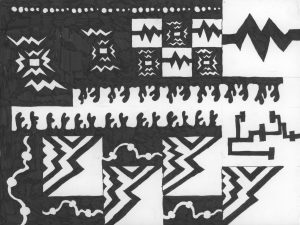
Pattern Squares: Now create at least 12 thumbnails: 6 for Staccato and 6 for Legato. Using your rhythmic line tests as a guide, create 6 pattern squares that represents STACCATO and 6 pattern squares that represents LEGATO. Continue to refine these sketches. Try varying the line weight (thick and thin) and the spacing (tight and wide) between the lines. Let the rhythm of each piece of music dictate the look and feel of your patterns. Refer to class pattern examples for ideas.
Once you have created at least 4 strong patterns (2 Staccato and 2 Legato) move on to the next step.
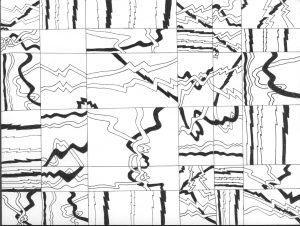
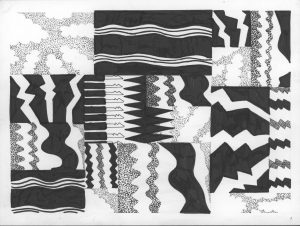
Inked MashupOn 9×11″ Bristol create 1 final inked composition using 1-2 Staccato and 1-2 Legato pattern squares. Even though the composition will be a field of pattern, it should feel unified using repetition and variations in scale. You will unite two rhythms (Staccato and Legato), like a DJ mixing parts of different songs or different rhythms. Some squares should be larger, some should be smaller, all pattern squares should repeat at least twice.
Create a Layout Grid: Before you begin working, create at least 3 possible layouts in your sketchbook. Think about how you will arrange your different pattern squares on the page.
- a Grid acts as an invisible or visible structure to support the elements of your composition.
- a Grid establishes a meter and rhythm.
- a Grid defines proportion and scale.
- a Grid helps to make content more accessible to the viewer
References:
- http://www.thinkingwithtype.com/contents/grid/
- http://www.designersinsights.com/designer-resources/using-layout-grids-effectively
Things to consider:
- How will my different staccato and legato patterns relate to each other?
- When the patterns meet/touch will they complement each other, blend together, or repel each other?
- What will the overall composition “sound” like?
Consider the Rule of Thirds: The rule of thirds works by dividing a composition into thirds, so you end up with 9 equal sections. The areas where the lines intersect are a good place for your main subject or focal point. You might also research The Fibonacci Spiral or the Golden Ratio. Using the spiral as a compositional tool helps to direct the viewer in a natural flow.
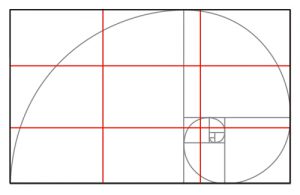
rule of thirds – golden ratio
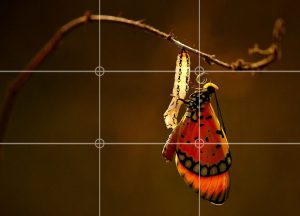
http://www.photographymad.com/
Inking : Once you have decided on a strong layout, draw it lightly on your 9×12″ bristol. Then begin to lightly draw in each pattern squares. Try to keep the pattern squares consistent, only vary the scale and orientation. ie: don’t stretch or crop the individual pattern squares. Once you have laid out the underdrawing, begin inking.Consider this layout from a former student, as an example. Notice how the squares of the grid vary in size and placement on the page. The relationship between the squares on the grid should contribute to the overall rhythm and unity of the composition.
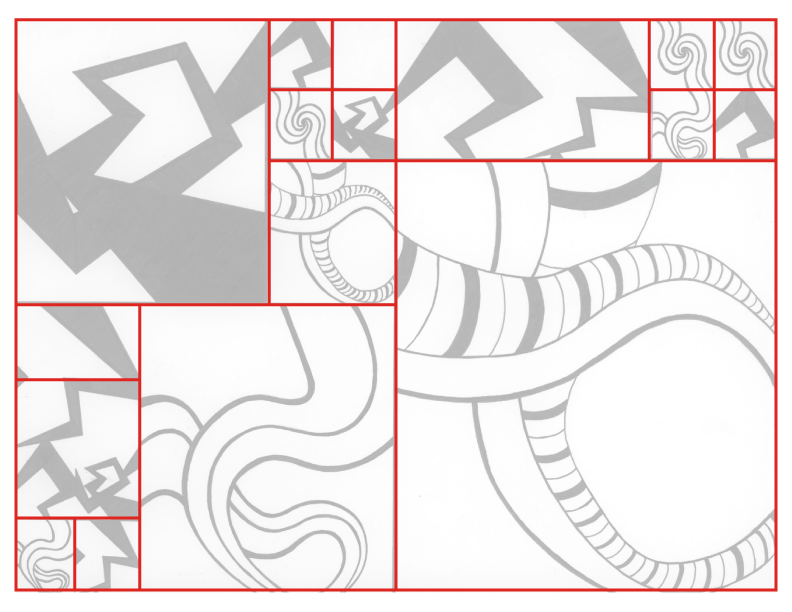
Grid Structure Overlay
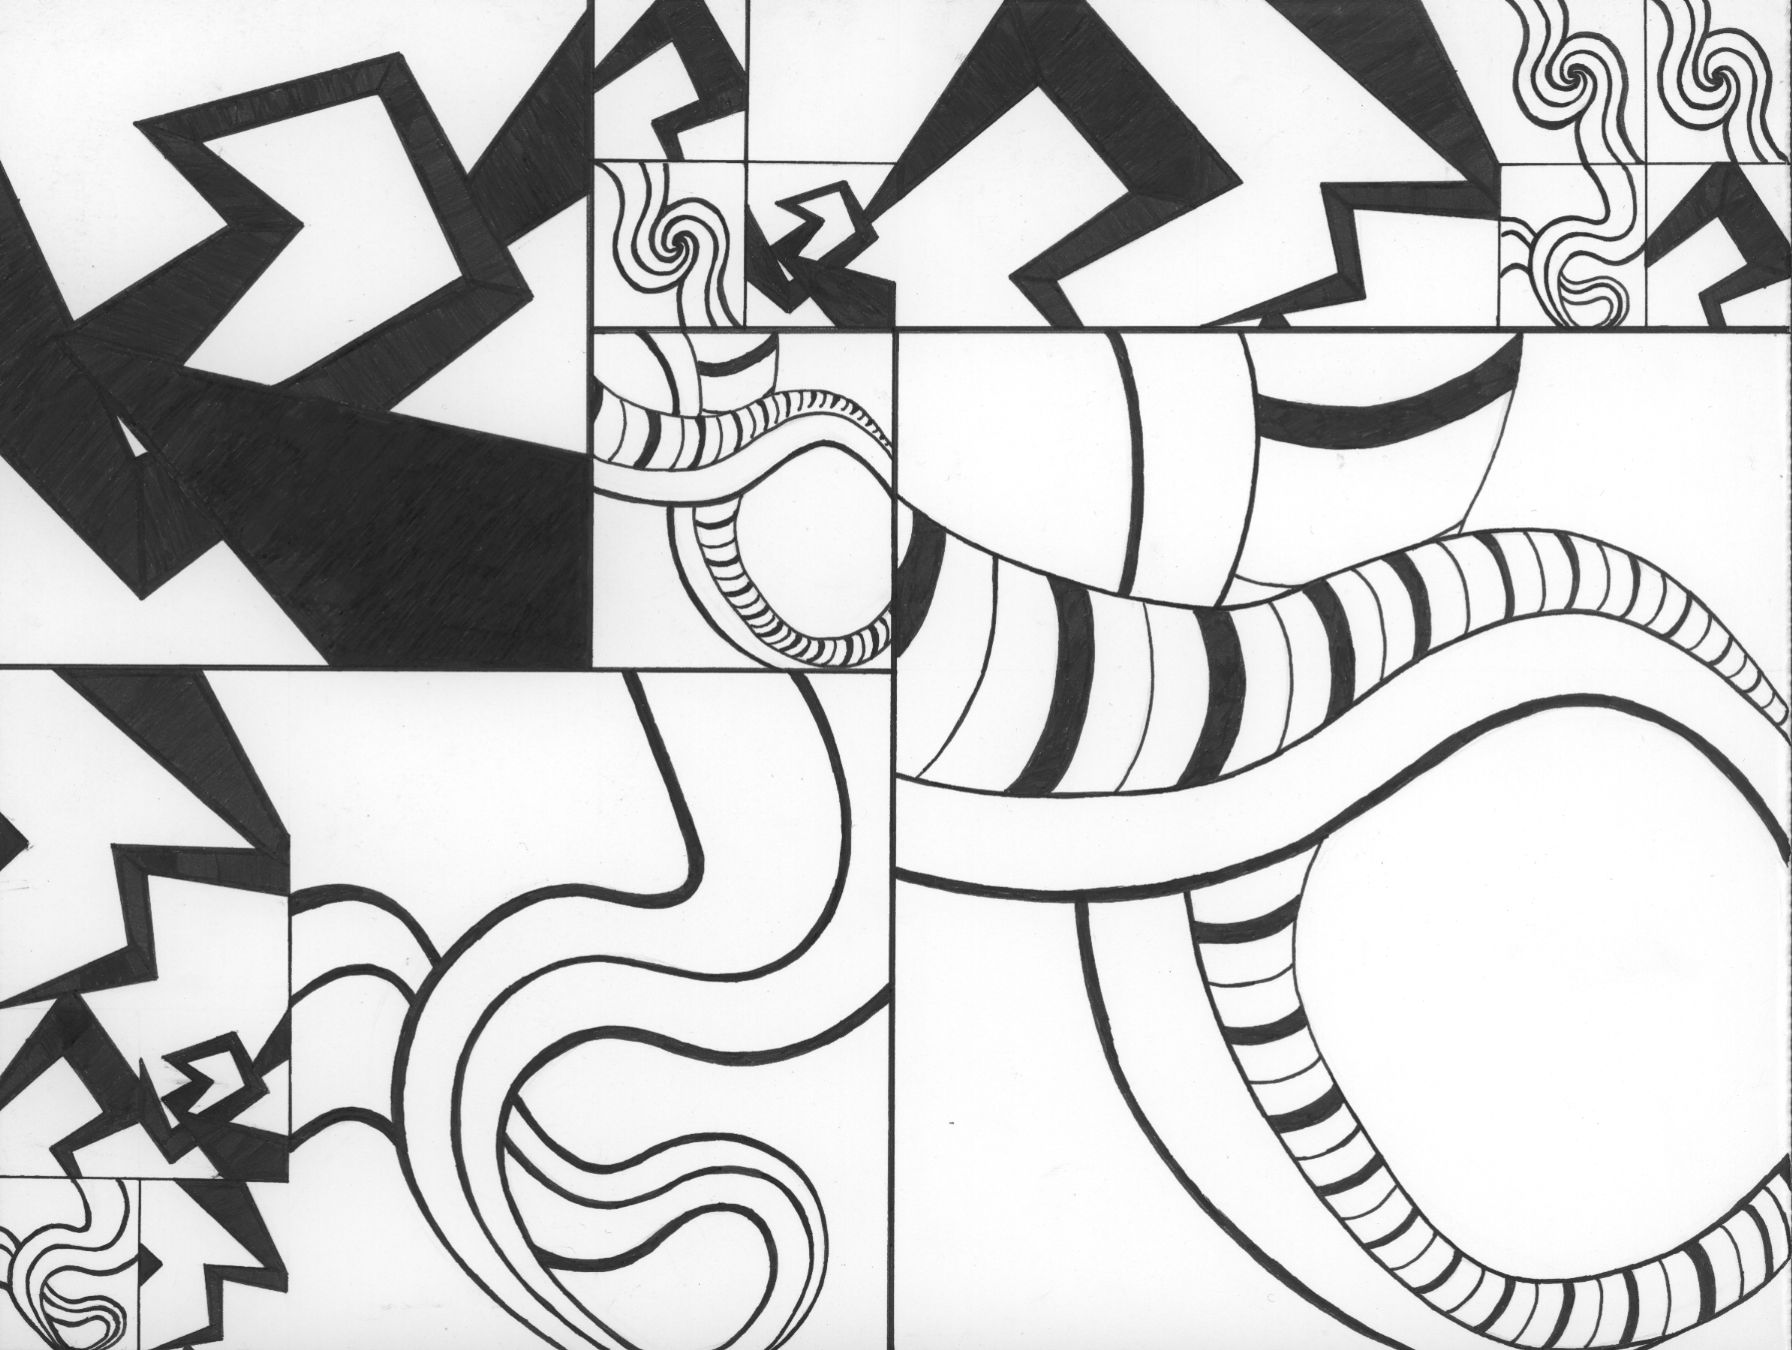
Daniel’s Final Pattern Mashup
Documentation and Feedback
- Create a new blog post called Sound Visualizations: Phase 2.
- Take a photo of your finished Inked Pattern Mashup and add it to the post (make sure it is well-lit and in focus.)
- Include the hours that you worked on this part of the project.
- Don’t forget to comment on at least 3 other student’s posts.
References: Class 8 and Class 9
Phase 3: Develop
Mashup Animation
Mashup REFERENCES:
- Stayin’ Alive In The Wall (Pink Floyd vs Bee Gees Mashup) by Wax Audio
- “Hahahrawrrahaha” Someone made a song using Jeff Goldblum’s weird laugh from Jurassic Park
- Brian Williams Raps “Rapper’s Delight“
- ‘The Great Gatsby’ Mash-Up Turns Leonardo DiCaprio Into a ‘My Little Pony‘
- A Designer’s Midcentury-Mod Music-Graphics Mashups
- Esoteric mash up
- The Magic of Mashups – Corporate Logos
- 7 Mashups That Will Change The Way You Look At Music Forever
SCAN:
- Create a folder on your drive called FirstInitalLastNameMashup
- Scan your finished inked Pattern Mashup (300dpi, grayscale, jpg). FIND YOUR SCANS HERE!
- Save this hi-res file as FirstInitalLastNameMashupHIRES.jpg to the folder you just created.
- Open your file in Photoshop, rename and save it FirstInitalLastNameMashupPrep.jpg and save it to the same folder. Make the following adjustments:
- Image size: 72 dpi, 1028 wide x768 high
- Color Mode: RGB
- SAVE AGAIN.
PREP in Photoshop:
- Using the rectangle marquee tool, cut (Command + X) and paste in place (Command + Shift + V) each pattern square on a new layer for use in your animation.
- We will do this together in class. Use this file to experiment with this technique.
- Save your files to your FirstInitalLastNameMashup folder.
Animate and Add Audio
- Create a short animation and audio mashup using the two songs with Staccato and Legato rhythms. Use Summertime and Another One Bites the Dust, if you wish. The songs you choose should demonstrate, very clearly, these two rhythms.
- We will do this together in class.
Exporting Your Animation for Web
- Preview your animation and check the frame rate (12 fps) to make sure it’s correct.
- Choose File > Export > Render Video.
- In the Render Video dialog box, enter a name for the video.
- Click the Select Folder button, and navigate to the location for the exported files.
- To create a folder to contain your exported file, select the Create New Subfolder option and enter a name for the subfolder.
- Choose Adobe Media Encoder from the menu below the Location section of the Render Video dialog box. Then choose H.264 file format from the pop-up menu.
- Under Range, select Work Area (Renders the frames selected by the work area bar in the Timeline panel)
- Click Render. This will save an mp4 file to the folder you specified above.
- Finally, upload your saved mp4 file to Dropbox or Google Drive and copy the link location.
Documentation and Feedback
- Create a new blog post called Sound Visualizations: Phase 3.
- Add a link to your mashup animation (on GDrive or Dropbox).
- Include the hours that you worked on this part of the project.
- Don’t forget to comment on at least 3 other student’s posts. These should be full, thoughtful critiques of your peer’s good effort. Be thoughtful and helpful. If you have ideas about how the work can be improved, share them!
References: Class 10 and Class 11
Phase 4: Deliver
Critique
- Be prepared to present, discuss and analyze your finished work in terms of concept, craft, what you learned, and the design process.
- State the following: your name, what you are presenting (title and design problem), which parts are successful and why, which parts are unsuccessful and why.
- Your peers and the professor will provide feedback. You will have an opportunity to revise your work based on the feedback and improve your grade.
Documentation and Feedback
- Create a new blog post called Sound Visualizations: Phase 4.
- In the post, document your thoughts about this project. Think about what you learned, what you could have done better (planning, material use, craft), and how you will apply what you learned to your next project. Consider and respond to the comments made in class during the critique.
- Include links to your three other Design Process posts for this project. (ie: Phase 1: Discover, Phase 2: Define, Phase 3: Develop)
- NOTE: You will receive a grade and comments from the Professor on this post.