December 9, 2015
What’s DUE:
- Steps 1-3 of Project #5 : Phase 3 Guidelines
- 10+ thumbnails and documented research to show idea development and critical thinking.
- Fully developed preparatory drawings showing your and your partner’s silhouette icon.
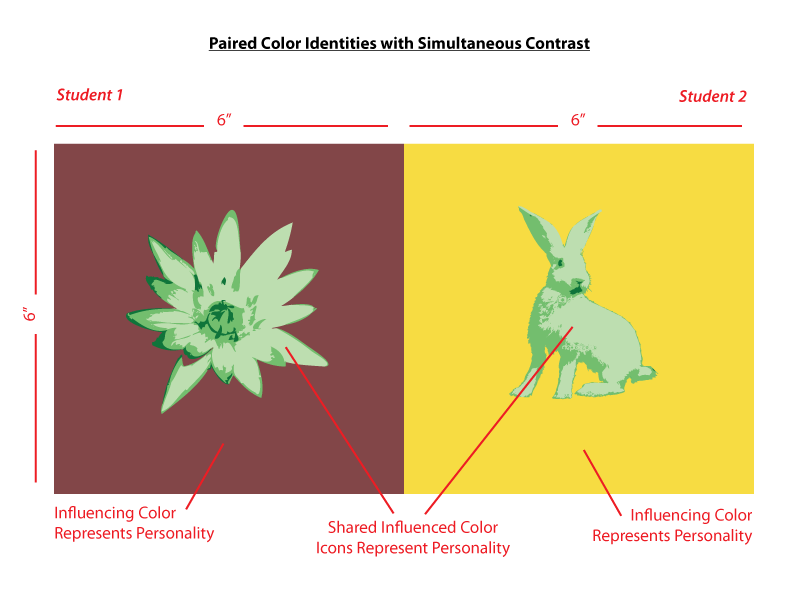
- Color mockup to clearly communicate color personalities and interactions.
- (5) Project #4 pages for HUMUMENT (this was due LAST class)
- Range of Saturation (Prismatic Color, Muted Color, Chromatic Gray)
- Luminosity
- Primary Colors & Secondary Colors
- Complementary Colors
- Color Temperature (Warm, Cool)
Critique
Present your Paired Color Identities Free-Study (in-progress) with your partner.
- 10+ thumbnails and documented research to show idea development and critical thinking.
- Fully developed preparatory drawings showing your and your partner’s silhouette icon.
- Color mockup to clearly communicate color personalities and interactions.
Present your Humument.
LAB
Free-Study work
- Scan your drawings – {dropbox link to scans}
- Guidance using illustrator to create your icon from drawings
- Continue work on Free-Study in class
- Practice good time management. You will present your final work next class. Make this one count!
Homework
ALL PARTS OF Project #5 ARE DUE!
- Review the guidelines to be sure you have completed everything including posts and comments to the class blog.
Print this page 


