Urban Artifacts Compositions
Problem: Create black & white figure-ground (stable and ambiguous) compositions based on the simplified forms created from small, discarded objects found on an urban sidewalk.
Limits: simple, flat, black shapes, no lines or text.
Materials: Sketchbook, pencils, marking pens, 1 sheet Bristol Board 9×12″, 1 sheet Bristol Board 14×17”, black drawing paper, scissors, exacto knife, ruler/t-square, glue, tracing paper.
Concepts: Shape (Organic, Geometric), Frame, Figure-Ground (Obvious, Ambiguous), Unity, Economy
Technical Skills: thumbnail sketching, draughmanship with ruler/t-square, inking pens, exacto knife and collage.
Phase 1: Discover (Class 2)
Writing
- Arrange your three objects on a piece of white paper as you would an archeological specimen.
- In your sketchbook write the heading: ‘Urban Artifact: Writing’ and compose a minimum 2-paragraph description of the three objects you discovered on the Urban Archeology Walk we took on the first day of class. Describe the shapes and their relationship to each other. Are they geometric or organic or both? Describe where you think these objects came from, imagining how they happened to turn up in the location that you found them.
-

- Photo: rla.unc.edu
-

- Photo by M. Moss.
Sketches
Create 6 obvious and 6 ambiguous figure-ground compositions.
- OBVIOUS: An obvious figure-ground will generally have an imbalance of figure and ground (70/30), wherein the ground “supports” or surrounds the figure.
- AMBIGUOUS: An ambiguous figure-ground will generally have a closer balance of figure and ground (50/50), wherein the differentiation between figure and ground become blurred. Often the figure will intersect the boundaries of the frame.
STABLE vs AMBIGUOUS
- Tear out 3 pages from your sketchbook.
- Fold each page in half. Each drawing will 9″x6″
- You will complete a total of 12 sketches: 6 obvious and 6 ambiguous.
- For each drawing, rearrange your objects and experiment by making a variety of obvious and ambiguous figure-ground compositions.
- Adjust the placement until the arrangements feel unified. In some instances, you may need to economize, removing some elements in order to create a more unified composition.
- Observe the objects (figure) and the background paper (ground). How do they relate? Try to “see” in terms of solid shapes, rather than lines, color, or texture.
- Carefully trace the outline of each object and fill in the shapes to clearly reinforce the figure-ground relationships.
- Choose the 2 most successful obvious and the 2 most successful ambiguous figure-ground compositions. Recreate, refine, and improve them.
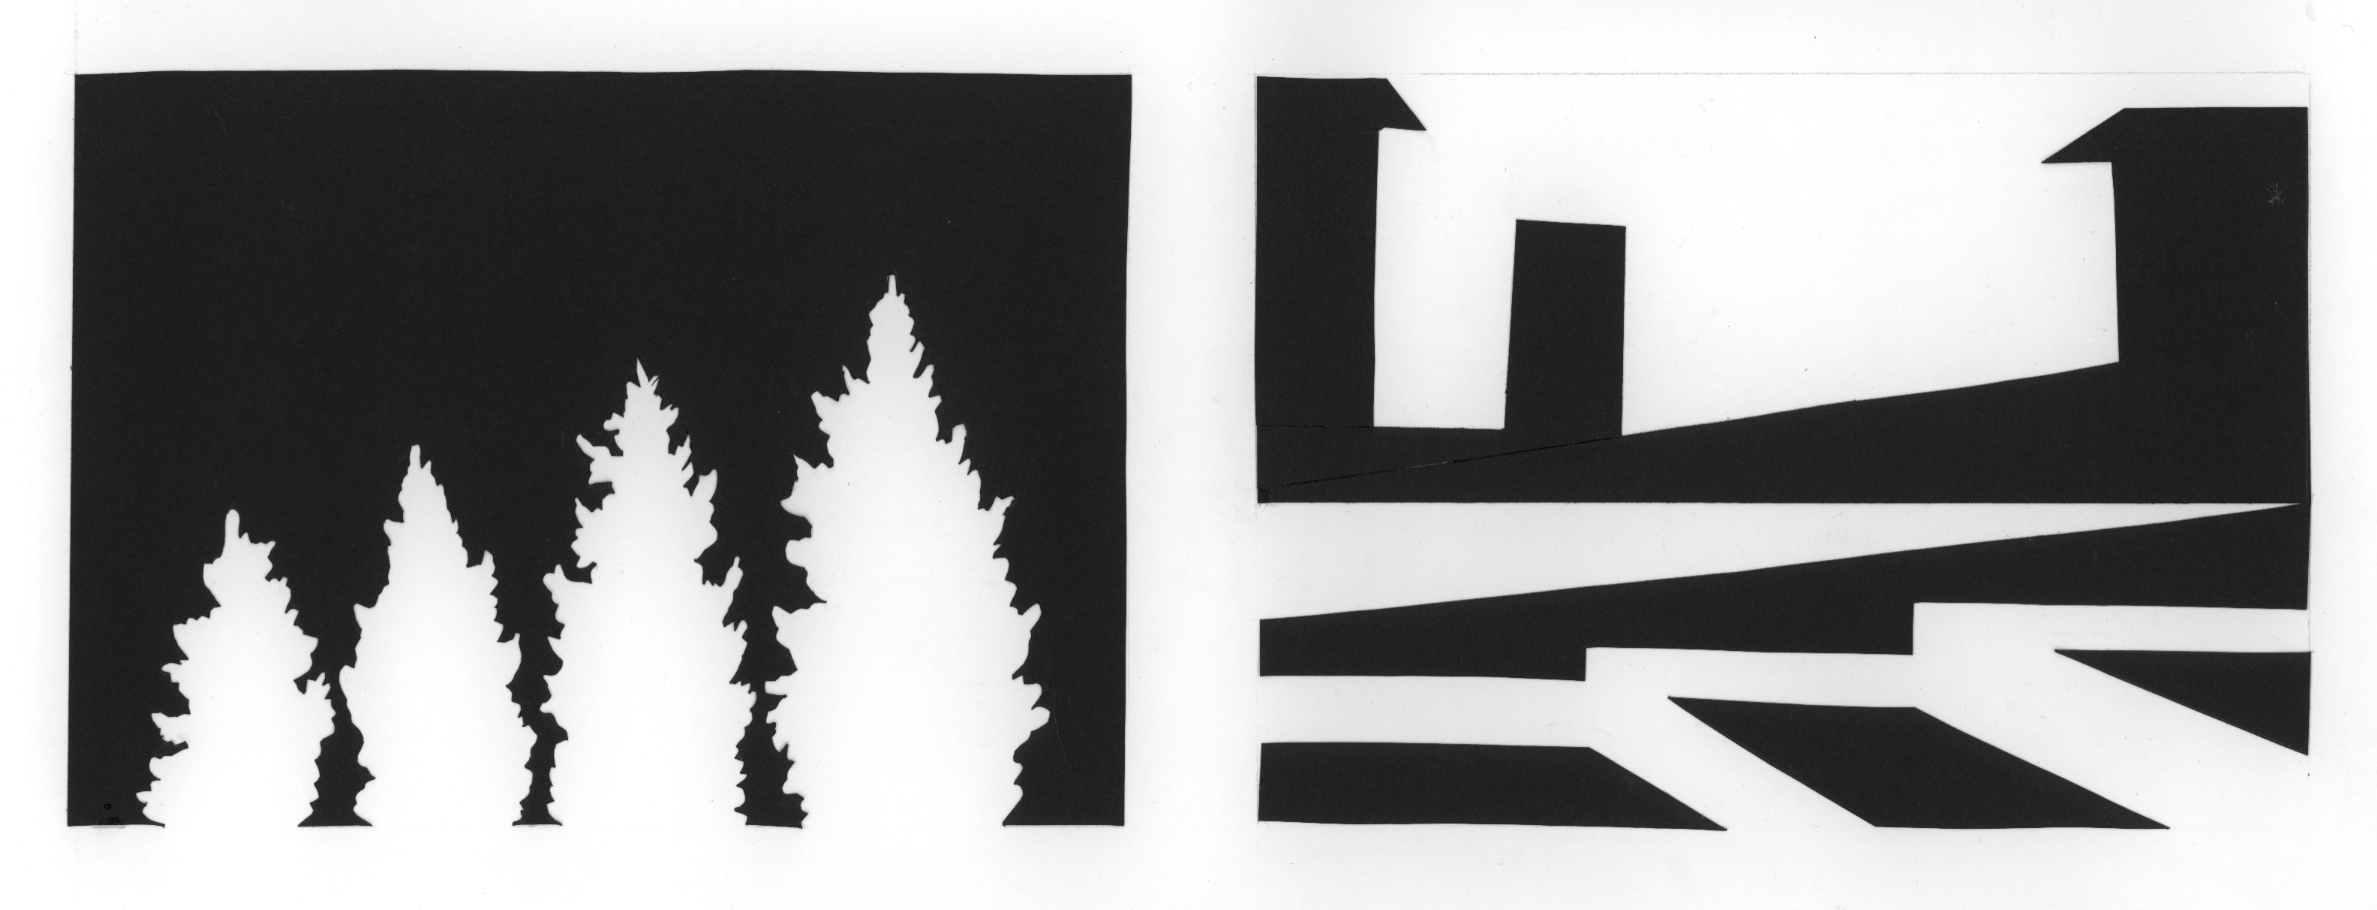
- STUDENT EXAMPLES: Can you determine which image demonstrates Obvious and Ambiguous Figure/Ground? And why? Are they all successful or could some be improved? How?
Example 1 | Example 2
Documentation and Feedback
- Create a new blog post called Urban Artifacts: Phase 1.
- Refine your writing and add it to the post.
- Take photos of your sketches (make sure they are well-lit and in focus) and add them to the post as a gallery.
- Include the hours that you worked on this part of the project.
- Don’t forget to comment on at least 3 other student’s posts.
Inked Sketches
- On 4 sheets of 9×12″ Bristol Board, measure a 9″x6″ rectangle with your ruler and t-square . There should be a 1.5″ margin on each side.
NOTE: Adjust the orientation of the page, as needed. - Based on the critique, take your 2 refined obvious and 2 refined ambiguous figure-ground compositions and transfer them to the Bristol Board using very light pencil. Feel free to use tracing paper or retrace your original objects to create 4 unified compositions.
- Use pen to fill in black areas and erase all extraneous pencil lines and measurements. Final work should be neat, clean and well-presented.
- REFERENCES: In these two examples notice the consideration of the figure-ground relationship and how it unifies the overall composition.
John Currin | Rousseau
Documentation and Feedback
- Create a new blog post called Urban Artifacts: Phase 2.
- Take photos of your finished Inked Sketches and add them to the post (make sure they are well-lit and in focus.)
- Include the hours that you worked on this part of the project.
- Don’t forget to comment on at least 3 other student’s posts.
Cut Paper Compositions
- Based on feedback from your inked sketches, choose the most successful obvious and ambiguous figure-ground compositions.
- Using your finished compositions as a guide, create 2 figure-ground relationships (1 obvious, 1 ambiguous) using black paper cutouts.
- With subtlety and economy, attempt to re-create and refine your compositions to communicate an emotion or concept, such as tension, loss, power, weakness, silence, energy, etc. Ideally the content (meaning) should relate back to your experience of finding these artifacts or the story you have imagined.
- These 2 compositions should be a culmination of the creative process so far. They should represent your most successful attempts at this design problem.
- On a sheet of 14×17″ Bristol Board, measure 2 rectangles with your ruler. There should be a 3″ margin on the bottom and 2″ margins on the top and sides. Between each rectangle there should be a 1″ margin.
- Using black drawing paper, scissors, exacto knife, ruler/t-square, glue, cut the black paper to desired shapes (figure) and arrange them on the bristol (ground). Refine and recut as necessary until you are satisfied that the whole composition functions in a unified way. It should be clear that both the ground and figure have been considered.
- Once you are satisfied with your compositions, using a hard (4H) pencil, lightly mark the contour/outline of each shape before you remove it.
- Then very carefully, using the gluing technique demonstrated in class, glue the shapes to the bristol.
- Package and protect your work using tracing paper.
Documentation and Feedback
- Create a new blog post called Urban Artifacts: Phase 3.
- Write a short description of this part of the project and how it relates to the previous phase.
- Take photos of your finished cut paper compositions and add them to the post (make sure they are well-lit and in focus.)
- Include the hours that you worked on this part of the project.
- Don’t forget to comment on at least 3 other student’s posts.
Critique
- Bring all parts of this project to class. Take a photo of the work displayed in the classroom.
- Be prepared to present, discuss and analyze your finished work in terms of concept, craft, what you learned, and the design process.
- State the following: your name, what you are presenting (title and design problem), which parts are successful and why, which parts are unsuccessful and why.
- Your peers and the professor will provide feedback. You will have an opportunity to revise your work based on the feedback and improve your grade.
Documentation and Feedback
- Create a new blog post called Urban Artifact: Phase 4.
- In the post, document your thoughts about this project. Think about what you learned, what you could have done better (planning, material use, craft), and how you will apply what you learned to your next project. Consider and respond to the comments made in class during the critique.
- Include the photo of the work as it is presented during the critique (ie: hanging on the wall).
- Don’t forget to comment on at least 3 other student’s posts.
Print this page 