Category Archives: Lecture

COMD Class 14 | Collage Crit & Painting

October 26, 2015

What’s Due?

  1. Complete Project #3: Phase 2. (Do Not GLUE!) Come ready to work on your paintings.
  2. Rework Project #3 Phase 1: Value Range Research Posts and Value Scale Research (Grayscale), if necessary.

Materials Needed:

Collage:

  • Sketchbook, pencils, eraser, knife/scissors, ruler/T-square, drafting tape

Painting:

  • white and black gouache paints
  • sable-type watercolor brushes (do not buy brushes for acrylic or oil)
    • FLAT:  1/2″ angle, #4
    • ROUND: #1, #5
  • two water containers (yogurt cups, soda bottles with tops cut off, soup cans)
  • palette (round 10-well)
  • cotton rags (old white t-shirts or scraps)

Critique

Students will present completed (2) 6″x6″ collages to the class.

  • (1) Narrow Value Range: either high-key or low-key
  • (1) Broad Value Range

Do the compositions presented follow the guidelines?

  • Is there a sense of MOVEMENT to direct the viewer to a clear FOCAL POINT emphasized through the use of CONTRAST and changes in VALUE?
  • Are the compositions 6×6″ squares?
  • Do you observe new shapes and lines created from the original portrait that convey a certain mood?
  • Is the work clean and neat and thoughtfully presented?

Lab

Continue work in class on Project #3: Phase 2 & Phase 3

Demo

Painting Prep:

  • Take a photo of  your finished and approved collage, just for future reference.
  • Use a small piece of tape on the back of each square to adhere them to a piece paper in your sketchbook.
  • Create a viewfinder frame, so that you only see one square at a time while you are working.
  • Keep everything clean and neat.

Once collage compositions are critiqued and approved, work on recreating your Broad Value composition in paint.

Broad-Range Painting:

  1. Recreate your broad-range collage in paint.
  2. Using your collage pieces as a visual reference, you will be using a viewfinder and grid and painting each area in isolation (independently) from its neighbor. This is VERY important.
  3. Create a viewfinder frame, so that you only see one area of your composition at a time while you are working. Draw grid lines around the edges of your collage (NOT ON TOP) to keep track of your progress.
  4. On a piece of clean, 9×12″ bristol trace or measure the dimensions of your collage squares from the exercise above.
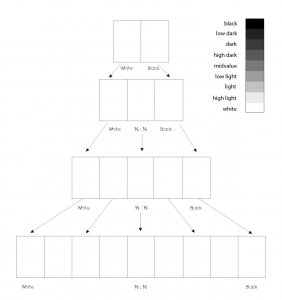
  5. Using your Value Scale as a guide, recreate (in gouache paint) each area of your composition using a range of black, white, and gray values- achieving continuous tone in areas where highlight and shadow blend together.
  6. Painting Tips:
    • Do not worry about accurately rendering an eye, nose or ear, think only in terms of value and the boundaries of each value shape relationship.
    • Notice how some values crossover shape boundaries into adjoining areas (open-value), while others are limited by the edges of the shape (closed-value).
    • Remember to work on each square independently and protect your finished painting with tracing paper as you work. Gouache is very delicate and can easily pick up the dirt and oils from your hands.
    • Mix a very small amount of water thoroughly into the paint, for each value you create. The consistency should be like whole milk or cream. Before you apply paint to paper make sure it’s completely mixed in the palette to produce a flat consistent appearance. We want flat, blocks of paint with few streaks or brush marks.
    • Wash your brush after each value is mixed and applied. Keep two containers of water, use 1 for washing your brushes and 1 for adding water to paint.
    • Use a paper towel or rag to get excess paint and water off the brush before mixing a new value.
  7. When you have completed your composition carefully protect all elements with a piece of clean tracing paper and cardboard.
  8. We will cut and mount the painting with the original collage together in class.

Homework

For next class:

  • Broad and Narrow Value Collages finished.
  • Start Broad-Value Painting. Come prepared to continue to work on Painting.
  • Same materials as today.

Print this page Download PDF

COMD Class 13 | FIELD TRIP + Project 3 Work

October 21, 2015

What’s DUE?

VALUE RANGE RESEARCH:

HUMUMENT Work:

  • Post an image or image gallery of your 5 Project #2 Humument pages.
    • Post title: Humument #2
    • Category: Humument
    • Tags (some or all, depending on your compositions presented): Line, Rhythm, Repetition, Variety, Pattern

Materials needed:

  • Download and PRINTOUT 5 laser prints of your portrait ((DOWNLOAD HERE))
    • IMPORTANT NOTE: IF you missed the last class and didn’t get your photograph taken, contact the professor BEFORE Wednesday.
  • Sketchbook, 9×12″ Bristol, pencils, eraser, knife/scissors, ruler/T-square, drafting tape.

Field Trip at 10 AM!

Meet at 10am at BRIC for a tour of the exhibition “Handmade Abstract” and the BRIC facilities.

Critique

  • Review High Key and Low Key posts.
  • Review Grayscale.

Lecture

Review Vocabulary

  • Elements: Value
  • Principles: Emphasis, Focal Point, Contrast, Movement
  • PLUS: Open and Closed Value and Scale
    • Closed-Value: Values are limited by the boundaries of shapes and clearly isolate individual parts of the composition. This type of composition could create dramatic mood through contrasting values.
    • Open-Value: Values cross shape boundaries, integrating parts with adjoining areas and unifying the composition. This type of composition could create a mysterious fog or haze using closely related values.
    • Rule of Thirds: The rule of thirds divides a composition into nine equal parts by two equally spaced horizontal lines and two equally spaced vertical lines. It is considered a compositional rule of thumb. The theory is that if you place points of interest in the intersections or along the lines and avoid the middle square that your composition is more balanced. (examples)
    • Proportion: Relationship between parts of a whole or related units.
      • Scale: Associations of size, related to a constant size, unit of measure, relative whole (such as a the human body, or picture plane)

LAB – Project #3

Collages

Goal: Create two 6″ collage compositions that use a sense of MOVEMENT to direct the viewer to a clear FOCAL POINT through  the use of CONTRAST and changes in VALUE. (past student examples)

  • Using the printouts of the portraits taken last class, cut apart your portrait into a variety of squares or rectangles.
  • Rearrange and experiment with your portrait pieces until your develop (2) unified, but ABSTRACT, 6″x6″ compositions as follows:
    • (1) Narrow Value Range: either high-key or low-key
    • (1) Broad Value Range
  • In each composition:
    • Create a focal point wherein one area or element is emphasized through contrast in scale and value.
    • Use Movement to clearly direct the viewer’s eye to the focal point.
    • Use Value steps to support transitions from one compositional element to another.
    • Avoid reconfiguring your compositions using recognizable facial features (eyes, nose, mouth).
    • Examine the lines and shapes that make up your portrait and create new shapes and lines that convey a certain mood.
  • DO NOT GLUE THEM DOWN YET!

NEXT

  • Take a photo of  your finished and approved collages, just for future reference.
  • Make sure each piece of your composition is properly marked on the back, indicating the TOP and numbered from left to right, top to bottom.
  • Position each piece in your collage composition on a piece of paper. Use a small bit of tape on the back to adhere your pieces to the paper.
  • Keep everything clean and neat.

Homework

  1. Complete Project #3: Phase 2. Come ready to work on your paintings.
  2. Rework Project #3 Phase 1: Value Range Research Posts and Value Scale Research (Grayscale), if necessary.

Materials Needed:

  • white and black gouache paints
  • sable-type watercolor brushes (do not buy brushes for acrylic or oil)
  • FLAT:  1/2″ angle, #4
  • ROUND: #1, #5
  • two water containers (yogurt cups, soda bottles with tops cut off, soup cans)
  • palette (round 10-well)
  • cotton rags (old white t-shirts or scraps)

Print this page Download PDF

COMD Class 12 | Value & Emphasis

October 19, 2015

What’s DUE?

  1. Combine Phase 3 and 4 feedback/documentation posts for Project #2 into one post. And comment on at least 3 other students animations.
  2. Complete Humument work for this project
    • Using Tom Phillips’ original Humument project as a guide, create a series of pages in your chosen book that demonstrate the concepts we’ve covered in this project:
      Line, Rhythm, Repetition, Variety, Pattern
    • Each page should clearly visually communicate these concepts to your reader/viewer:
    • Experiment with blocking out and/or revealing certain areas of text or individual words to communicate your concepts.
    • Use pencils, inking pens and (collage) to create your pages.
    • Consider trying to create a flipbook animation in one of the corners of the book.
    • These should be beautiful objects when complete.
  3. Materials Needed:
    • white and black gouache paints
    • sable-type watercolor brushes (do not buy brushes for acrylic or oil)
    • FLAT:  1/2″ angle, #4
    • ROUND: #1, #5
    • two water containers (yogurt cups, soda bottles with tops cut off, soup cans)
    • palette (round 10-well)
    • cotton rags (old white t-shirts or scraps)

Critique

  • We will review all Animated Mashups from the class blog.
  • And Humument work.

Check your grade

  • Request a password using the request password link (Password is for this site only)
  • Enter your City Tech email and new password on the Check Your Grade page.
  • Your grade + comments will be displayed on screen.
  • See me with questions or concerns.

Lecture

The Elements: basic components used as part of any composition, independent of the medium.

  • Value:Signifies the relative differences of light and dark
    • Achromatic: Value with the absence of hue (color) and saturation (intensity).
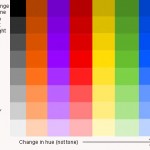
    • Chromatic: Value demonstrated by a given hue.
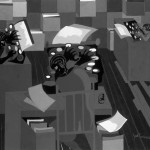
    • Grayscale: The full range of values simplified into a graduated scale.
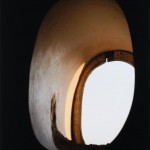
    • Low-Key: When the values of an image are predominately dark
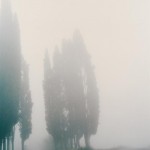
    • High-Key: When the values of an image are predominately light
    • Narrow Range: When the values congregate around the dark, middle, or light part of the grayscale.
    • Broad Range: When the values are spread over the dark, middle, or light part of the grayscale.
    • Shadow: Dark area of an object as a result of a disruption of the light source.
    • Highlight: Portion of an object that receives the greatest amount of direct light
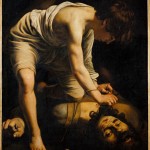
    • Chiaroscuro/Tenebrism: Forceful use of contrasting lights and darks, creating a dramatic mood.

The Principles: basic assumptions that guide the design practice.

  • Emphasis: The special attention or importance given to one part of a composition. Emphasis can be achieved through placement, contrast, size, etc.
    • Dominance/Hierarchy: The expression of visual and conceptual order that communicates degrees of importance of the various parts of a composition. This can also be achieved through placement, contrast, size, etc.
    • Focal Point: The elements or objects on which the viewer’s attention is focused.
  • Contrast: Occurs when elements are unrelated or dissimilar in value, size, shape, etc. Increasing contrasts can create dominance.

References:

LAB

Value Range Research

  1. We will take a short walk around City Tech.
  2. Using your camera or camera phone*, compose 2 photographs with the following qualities:
    • (1) predominately within the high-key value range
    • (1) predominately within the low-key value range
  3. If you have the ability to shoot in grayscale, please do.
  4. Designate a new section of your sketchbook and write ‘Value-Added Portraits’.
  5. Compose a minimum 2-paragraph description, with specific references to the images, indicating how the key sets the mood of the composition. Also notice and report how the forms in the composition create highlight and shadow relationships; some may be abrupt, others may have a gradation of value from light to dark. How does this contribute expressive quality (mystery, drama, success, joy, etc) of the compositions?

* If you don’t have a camera, please partner with another student who does.

Value Scale

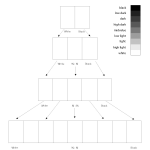
Complete the Achromatic Value Scale using pencils

  • On the handout provided, create 4 scales starting with 2 steps and ending with 9 steps ranging from black to white in even, progressive increments.
  • Label (in good handwriting) your 9-step value scale with black, low dark, dark, high dark, mid-value, low light, high light, white.
Achromatic Value Scale

Achromatic Value Scale

Photo-shoot

  • Please come and get your photo taken by the professor (for use in the next project)
  • IF you miss this class and didn’t get your photograph taken, contact the professor BEFORE THE NEXT CLASS.

Homework

Complete the following before next class:

VALUE RANGE RESEARCH:

  • Post your paragraphs and 2 final images (high key and low key) to the class blog (see Project #3: Phase 1 Guidelines.) Don’t forget to comment on at least 3 other students posts.
  • Finish the value scale exercise (print here) we started in class.

HUMUMENT Work:

  • Post an image or image gallery of your Humument pages.
    • Post title: Humument #2
    • Category: Humument
    • Tags (some or all, depending on your compositions presented): Line, Rhythm, Repetition, Variety, Pattern

Materials needed:

  • Download and PRINTOUT 5 laser prints of your portrait ((DOWNLOAD HERE))
    • IMPORTANT NOTE: IF you missed this class and didn’t get your photograph taken, contact the professor BEFORE THE NEXT CLASS.
  • Sketchbook, 9×12″ Bristol, pencils, eraser, knife/scissors, ruler/T-square, drafting tape.
  • Painting supplies needed for this project (if you haven’t already purchased them)
    • white and black gouache paints
    • sable-type watercolor brushes (do not buy brushes for acrylic or oil)
      • FLAT:  1/2″ angle, #4
      • ROUND: #1, #5
    • two water containers (yogurt cups, soda bottles with tops cut off, soup cans)
    • palette (round 10-well)
    • cotton rags (old white t-shirts or scraps)

Field Trip NEXT CLASS:

Meet at 10am at BRIC for a tour of the exhibition “Handmade Abstract” and the facilities.

Print this page Download PDF

COMD1100 Class 11: Sound Mashup

October 14, 2015

What’s needed for this class:

  1. Complete Staccato / Legato Animated Mashup.
    • Bring the HTML5 link and the animated gif to class.
    • Find your hi-res and sliced images for animation in this Dropbox folder.
    • NOTE: If you didn’t finish your inked mashup, please scan and slice using the guidelines above.
  2. All parts of Project #2 are due by the end of class, but we will add audio to your mashup in class and finish it together.
    • Bring two audio files (mp3, wave, aiff, m4a, ogg) to work with: one piece with staccato rhythm and one with legato rhythm.
    • You may also use the sample audio files provided.

Lab: Adding Sound

We will be importing two pieces of music, one with staccato rhythm and one with legato rhythm. You may use the two sound files for the project in the Dropbox folder.

  1. Move your sound files (MP3, WAV, AIFF, M4A, and OGG file formats are acceptable) into your project folder on the desktop.
  2. Open your animation project in animatron.com by signing in and choosing the project from the Project menu.
  3. From the Animatron icon in the upper left corner, choose Import: Image, SVG, Audio, Font 
  4. Navigate to the sound files and import the two files provided or your own.
  5. Add the audio files to the timeline and choose sections of each song to mix together.
  6. You are only working with a 2 second timeline, so we will use End Actions > Loop (2 times) to increase the animation to 4 seconds.
  7. We will also soften the in and out points using keyframes and adjusting the volume.
  8. If you’d like more information about editing audio in animatron, here is a tutorial.
  9. Export/Publish your animation with sound using HTML5.

Documentation and Feedback

  • Create a new blog post called Sound Visualizations: Phase 3.
  • Add a link or embed to your animation and sound mashup
  • Include the hours that you worked on this part of the project (both animation and sound).
  • Don’t forget to comment on at least 3 other student’s posts.

Critique

Present your finished animated mashups to the class.

Homework

  1. Check your grade
    • Request a password using the request password link (Password is for this site only)
    • Enter your City Tech email and new password on the Check Your Grade page.
    • Your grade + comments will be displayed on screen.
    • See me with questions or concerns.
  2. Materials Needed for next class:
    • white and black gouache paints
    • sable-type watercolor brushes (do not buy brushes for acrylic or oil)
    • FLAT:  1/2″ angle, #4
    • ROUND: #1, #5
    • two water containers (yogurt cups, soda bottles with tops cut off, soup cans)
    • palette (round 10-well)
    • cotton rags (old white t-shirts or scraps)
  3. Combine Phase 3 and 4 feedback/documentation posts for Project #2 into one post. and comment on at least 3 other students animations.
  4. Complete Humument work for this project
    • Using Tom Phillips’ original Humument project as a guide, create a series of pages in your chosen book that demonstrate the concepts we’ve covered in this project:
      Line, Rhythm, Repetition, Variety, Pattern
    • Each page should clearly visually communicate these concepts to your reader/viewer:
    • Experiment with blocking out and/or revealing certain areas of text or individual words to communicate your concepts.
    • Use pencils, inking pens and (collage) to create your pages.
    • Consider trying to create a flipbook animation in one of the corners of the book.
    • These should be beautiful objects when complete.

Print this page Download PDF

COMD Class 10 | Mashup Animation

October 8, 2014

What’s due for this class?

  1. DUE: Final inked version of your Pattern Mashup on a piece of 9″x12″ bristol board, based on your finalized preparatory compositions. Come prepared to present your work!
  2. Post to the blog.
    • Create a new blog post called Sound Visualizations: Phase 2.
    • Take photos of your finished Inked Pattern Mashup and add them to the post (make sure it is well-lit and in focus.)
    • Include the hours that you worked on this part of the project.
    • Don’t forget to comment on at least 3 other student’s posts.
  3. Materials needed: Flash/jump drive.

Critique

Present your finished inked mashups to the class.

Discussion

  • Sampling
  • Fair Use
  • Copyright

Examples:

Lab 1 : Scanning and preparing digital files

SCAN:

  • Create a folder on your drive called FirstInitalLastNameMashup
  • Scan your finished inked Pattern Mashup (300dpi, grayscale, jpg).
  • Save this hi-res file as FirstInitalLastNameMashupHIRES.jpg to the folder you just created.
  • Open your file in Photoshop, rename it FirstInitalLastNameAnimatedMashup.jpg and save it to the same folder. Make the following adjustments:
    • Image size: 72 dpi, constrain proportions
    • Color Mode: RGB
  • SAVE AGAIN.

PREP in Photoshop:

  • Using the slice tool, slice up each pattern square for use in your animation.
  • We will do this together in class.
  • Save your files to your FirstInitalLastNameMashup folder.

LAB 2: Animating your mashup

You will create an animation using the sample files provided (here) and then repeat the process with your own images once your inked mashup has been scanned.

  1. Visit animatron.com
  2. Watch the starter tutorial.
  3. Create an account or login via social media.
  4. From the Animatron icon in the upper left corner, choose Project > New Project.
  5. Name the projectFirstInitalLastNameAnimatedMashup
  6. From the Animatron icon in the upper left corner, choose Import: Image, SVG, Audio, Font 
  7. Navigate to the sample images or your own sliced images and import.
  8. Click on the Project Library button, you should see all the images.
  9. Set the size of the project to: 864 high x 648 wide
  10. Move the Time Duration Flag to 2 seconds.
  11. Now you are ready to begin!

Guidelines:

  • Create a minimum 2 second animation using slices from your scanned inked Pattern Mashup.
  • Start with a blank screen (at 0 seconds) and animate the sliced images onto the screen to assemble the mashup using translate, rotate, scale and opacity tweens (at 1 second).
  • Then copy and paste the starting keyframes (at 0 seconds) to the 2 second marker. This will allow the animation to loop (blank screen > assembled mashup > blank screen).
  • Adjust the keyframes so that there is a pause/hold around the 1 second marker. We want to be able to see the assembled mashup for a brief time before it breaks apart again.
  • If you’d like to increase your animation to longer than 2 seconds that’s fine too.

Tutorials:

What is a TWEEN?

The four types of tweens in Animatron are:

  1. Translate – changes in an object’s position on the canvas.
  2. Rotate – changes in an object’s angle.
  3. Scale – changes in an object’s size. (IMPORTANT!! don’t increase a bitmap object’s size)
  4. Opacity – changes in an object’s transparency.

Use these four types of tweens to animate your mashup from a blank screen (0 second marker) to assembled mashup (1 second marker) using keyframes.  Return to a blank screen again (2 seconds marker) by copying the starting keyframes and pasting them at the end.

Troubleshooting:

Exporting the animation:

There are two ways to export or publish the animation once competed. Do both.

  • HTML5: this will create a link to page that will play the animation
  • GIF: this will give allow you to save the animated gif, but at a lower frame rate (10 fps)

Homework

  1. Complete Staccato / Legato Animated Mashup.
    • Bring the HTML5 link and the animated gif to class.
    • Find your hi-res and sliced images for animation in this Dropbox folder.
    • NOTE: If you didn’t finish your inked mashup, please scan and slice using the guidelines above.
  2. All parts of Project #2 will be due on Wed. 10/14, but we will add audio to your mashup in class and finish it together.
    • Bring two audio files (mp3, wave, aiff, m4a, ogg) to work with: one staccato rhythm and one legato rhythm.
    • You may also use the sample audio files provided.
  3. Materials Needed for next project:
    • white and black gouache paints
    • sable-type watercolor brushes (do not buy brushes for acrylic or oil)
      • FLAT:  1/2″ angle, #4
      • ROUND: #1, #5
    • two water containers (yogurt cups, soda bottles with tops cut off, soup cans)
    • palette (round 10-well)
    • cotton rags (old white t-shirts or scraps)

Print this page Download PDF